The practical upshot: in most jurisdictions, growing P. cyanescens to fruiting is illegal without specific licensing or authorization. Spore syringes or prints are sold legally in many places for microscopy and taxonomic research, but using them to produce mushrooms is a different legal matter entirely. Before you do anything else, check the laws in your specific country, state, or province. This guide covers cultivation principles, techniques, and the biology of this species so you understand how it all works. It is your responsibility to apply that knowledge within whatever legal framework applies to you.
On the safety side: working with any fungal culture involves spore exposure. The EPA recommends using NIOSH-approved respirators with P100 filter cartridges when working around airborne spores in any significant quantity. A basic N95 is a minimum for inoculation work; a proper half-face respirator with P100 cartridges is better if you're doing this regularly. Nitrile gloves, a clean work area, and keeping your face away from open cultures are all non-negotiable habits.
What Makes Cyanescens Different from Other Psilocybe Species
P. cyanescens is a wood-loving species, which sets it apart from the grain-and-dung-preferred P. cubensis that most grow guides cover. It colonizes woody debris, mulch, and wood chips, particularly alder and other hardwoods. It's a cold-weather fruiter: it needs a genuine temperature drop to trigger pinning, typically into the 50-60°F (10-15°C) range. This single fact shapes every cultivation decision you'll make. Trying to fruit it at room temperature in summer will give you nothing. Its natural season is late autumn through early winter in temperate climates.
The good news is that P. cyanescens is considered robust and adaptable. Cultivation techniques that work for other wood-loving Psilocybe species transfer well to this one, and it colonizes aggressively once established. It also fruits gregariously in tight cespitose clusters, which means when it fruits well, it really fruits well. One square foot of a well-colonized alder chip bed can realistically yield around 1 lb of wet weight in a season.
Indoor vs Outdoor: Which Setup Is Right for You
This is the biggest decision you'll make, and it's genuinely split for this species. Most P. cubensis growers default to indoor setups because temperature control is easy and the fruiting window is flexible. With P. cyanescens, outdoor beds have a strong argument because the species evolved to fruit in cold, wet, temperate conditions that are difficult and expensive to replicate indoors. That said, indoor is possible with the right setup.
| Factor | Indoor Setup | Outdoor Bed |
|---|
| Temperature control | Requires refrigeration or cold room to hit 50-60°F fruiting temps | Natural autumn drop does the work for you |
| Humidity | Needs active misting, humidifier, and FAE management | Rain and natural humidity handle most of it |
| Contamination risk | Higher without strict sterile technique; confined space concentrates contaminants | Lower once established; soil biome competes with contaminants |
| Setup cost | Moderate to high (fruiting chamber, humidifier, possibly mini-fridge) | Low (wood chips, spawn, outdoor space) |
| Yield visibility | Easier to monitor and harvest | Can be harder to track; spread across a bed |
| Legal exposure | More contained, but still applies to your jurisdiction | Same legal considerations apply |
| Seasonal control | Can attempt year-round with cooling | One season per year in most climates |
| Best for | Experienced growers with cold room or basement setup | Anyone with a suitable shaded garden or woodland edge |
My honest recommendation: if you have outdoor space with dappled shade, reasonable autumn rainfall, and temperatures that drop into the 50s°F naturally, start outdoors. It's cheaper, more forgiving, and this species genuinely performs better in its natural environmental range. If you're committed to indoor for control or space reasons, you'll need a way to cool your fruiting chamber down to that 50-60°F window, which usually means a basement, a dedicated mini-fridge setup, or growing in late autumn/winter when ambient temperatures cooperate.
Starting materials: spores and spawn
In jurisdictions where spores are legal to purchase for microscopy, P. cyanescens spore syringes or prints are available from specialty vendors. Remember the legal distinction mentioned above: purchasing spores for research versus using them to cultivate mushrooms are treated very differently by the law depending on where you live. Some cultivators start from agar cultures or grain spawn sourced from mycology suppliers, which accelerates the process significantly versus starting from spores. If you have access to colonized grain or agar wedge transfers from a trusted source, that's a faster and more reliable starting point.
- Quart or half-pint mason jars for grain spawn (if starting from spores or agar)
- Pressure cooker (15 PSI capable) for sterilizing grain spawn
- Polypropylene bags with filter patches for bulk substrate if going indoor
- Plastic tote or mono tub for fruiting chamber (indoor method)
- Humidity/temperature gauge (a cheap digital combo unit works fine)
- Spray bottle for misting
- 70% isopropyl alcohol and nitrile gloves for all transfer work
- Still air box or laminar flow hood for agar/inoculation work
- Large plastic tubs or landscape fabric for outdoor bed construction
- Alder, beech, or oak wood chips (freshly chipped hardwood preferred)
Sourcing substrate materials
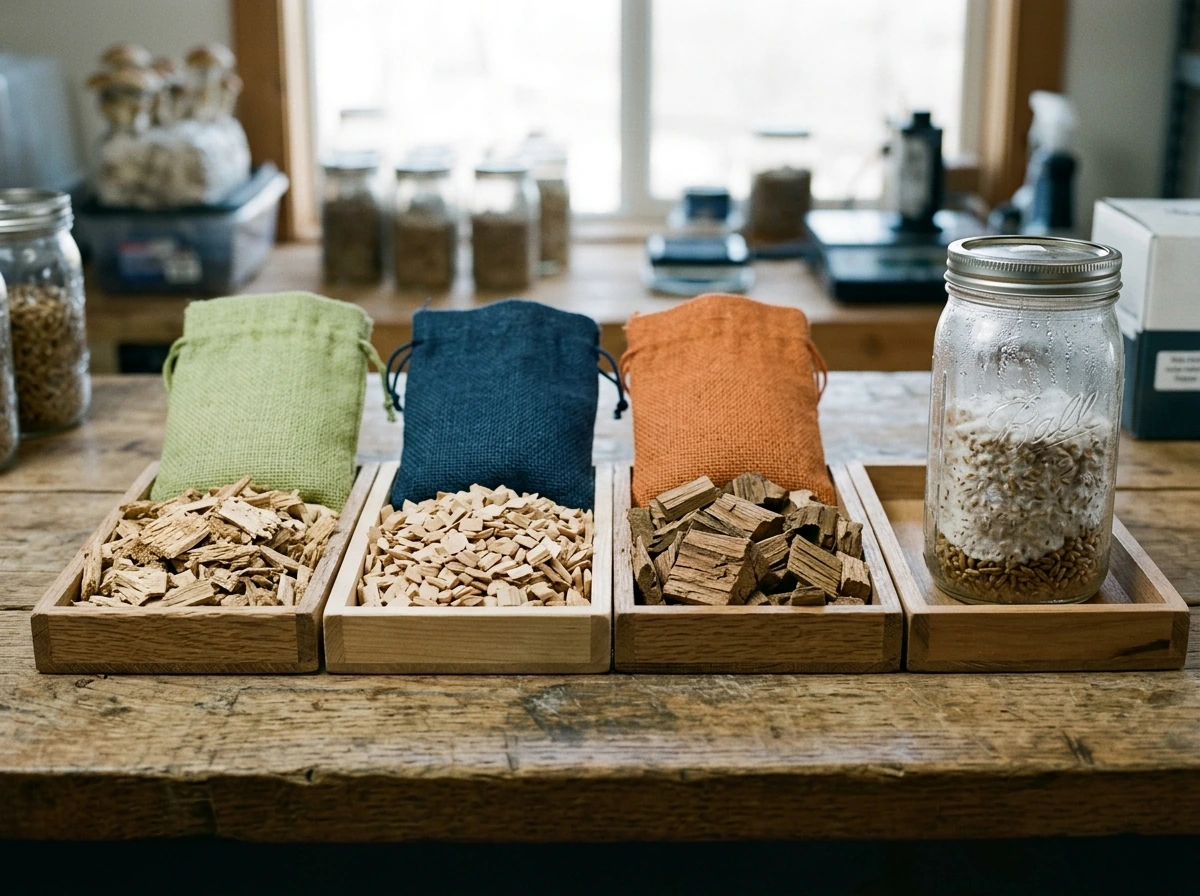
For outdoor beds, freshly chipped hardwood is your main material. Alder is the gold standard for P. cyanescens based on documented natural growth patterns, but beech, oak, and other hardwoods work well. Avoid cedar, pine, and other conifers because the volatile oils inhibit mycelial growth. Many tree services will give away fresh wood chips for free if you ask. For indoor methods, you can use supplemented wood chip/sawdust substrate, sometimes with a small addition of wheat bran for nutrition, though heavy supplementation increases contamination risk.
Substrate Preparation and Colonization
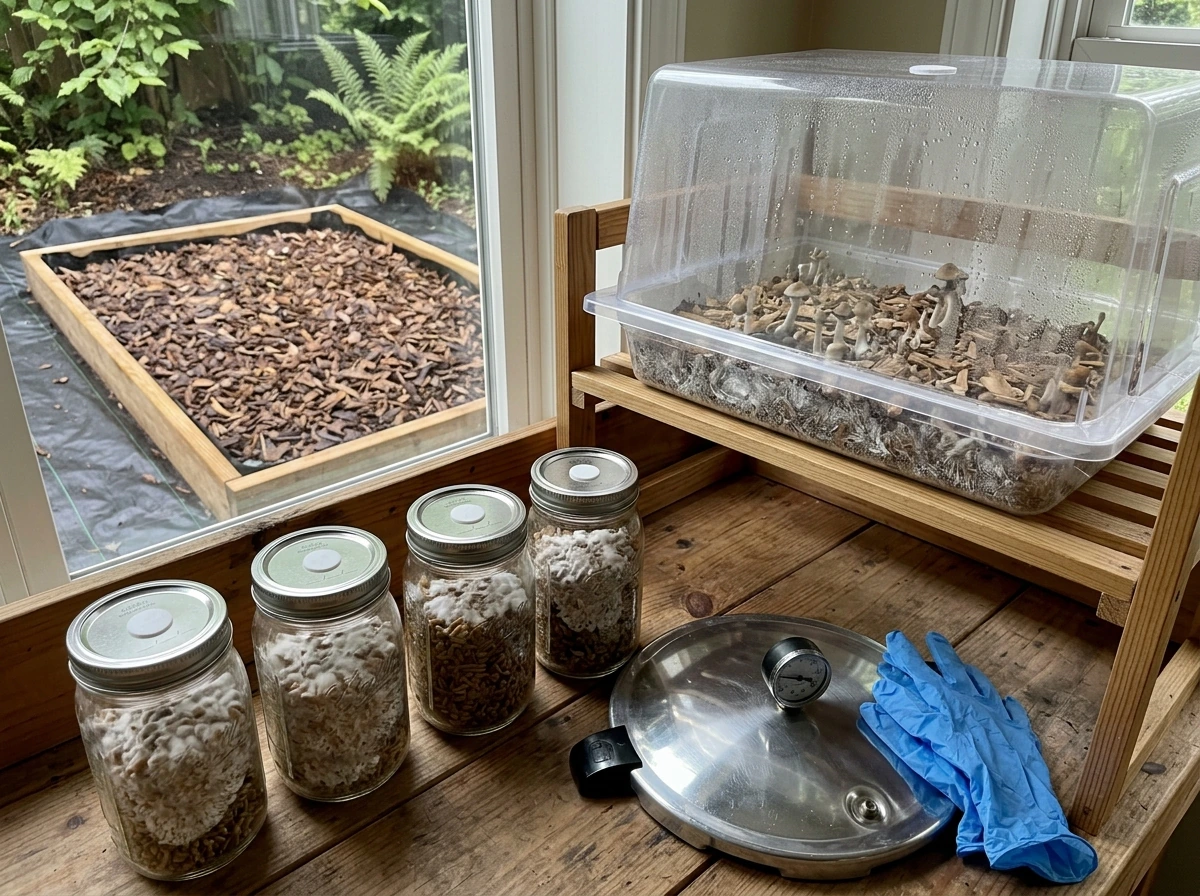
Indoor colonization setup
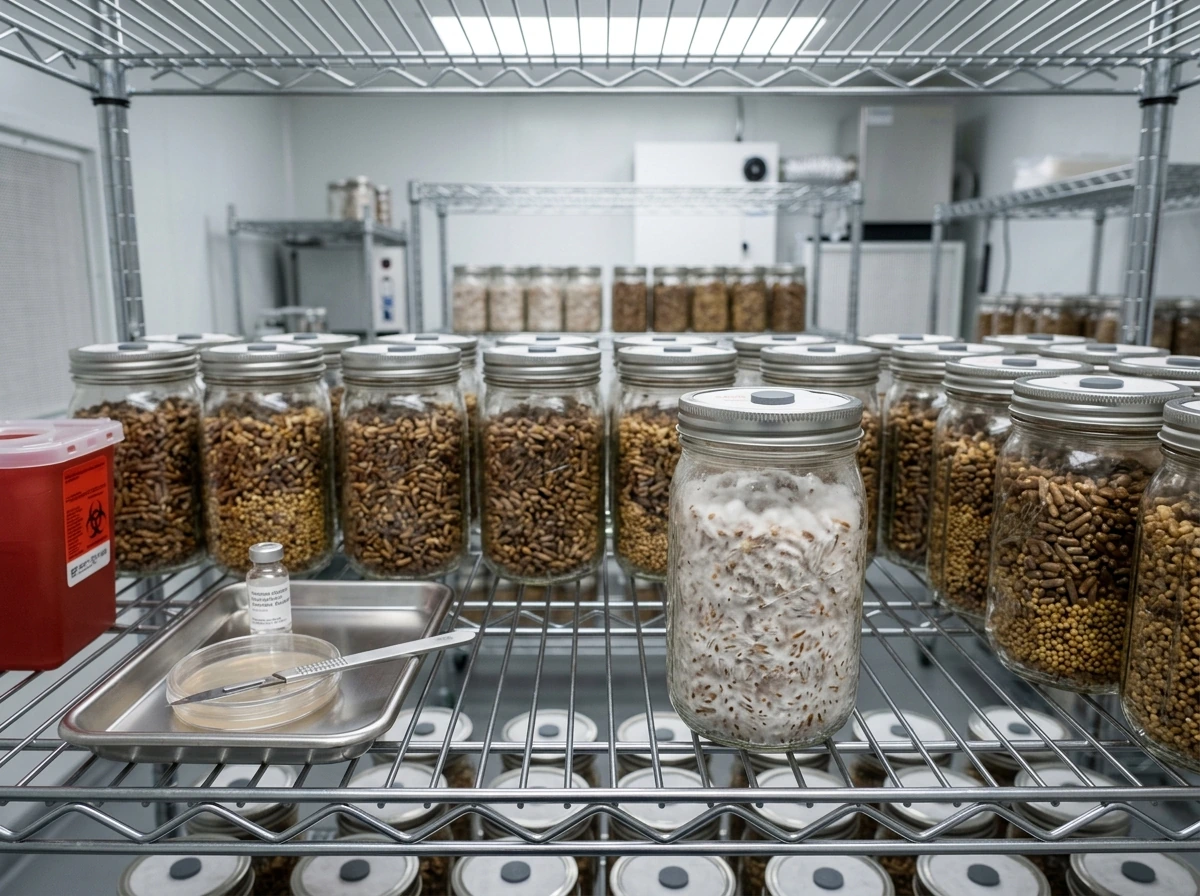
For indoor cultivation, you're working in two stages: first colonizing grain spawn, then transferring that spawn to a bulk wood-based substrate. Sterilize your grain spawn at 15 PSI for 90 minutes in a pressure cooker. Let jars cool completely before inoculation. Inoculate under still air conditions or in a flow hood, wipe the injection port with 70% isopropyl before and after, and do not breathe directly over open jars. This is where most contamination enters.
Once inoculated, grain jars colonize at 50-60°F (10-16°C) for this species, which is lower than the 75-80°F range you'd use for cubensis. According to documented cultivation parameters, P. cyanescens colonization prefers air temperatures around 50-60°F with relative humidity around 95% and minimal fresh air exchange during this phase (essentially sealed, high CO2 at 10,000 ppm or above is fine while the mycelium is running). Colonization is complete when you see dense white mycelial growth throughout the jar with no green, black, or pink patches.
When grain is fully colonized, you're ready to transfer to bulk substrate. For P. cyanescens, a hardwood sawdust and wood chip blend works well. Pasteurize (not necessarily full sterilization) at around 160-180°F for an hour by field capacity-hydrating and then oven-pasteurizing in a covered foil tray. Incomplete pasteurization is one of the most common reasons bulk substrate gets contaminated, so don't rush this step. Mix colonized grain at roughly a 1:4 to 1:5 spawn-to-substrate ratio, pack into polypropylene bags or tubs, and allow to colonize fully. This can take 3-5 weeks at the cool temperatures this species prefers.
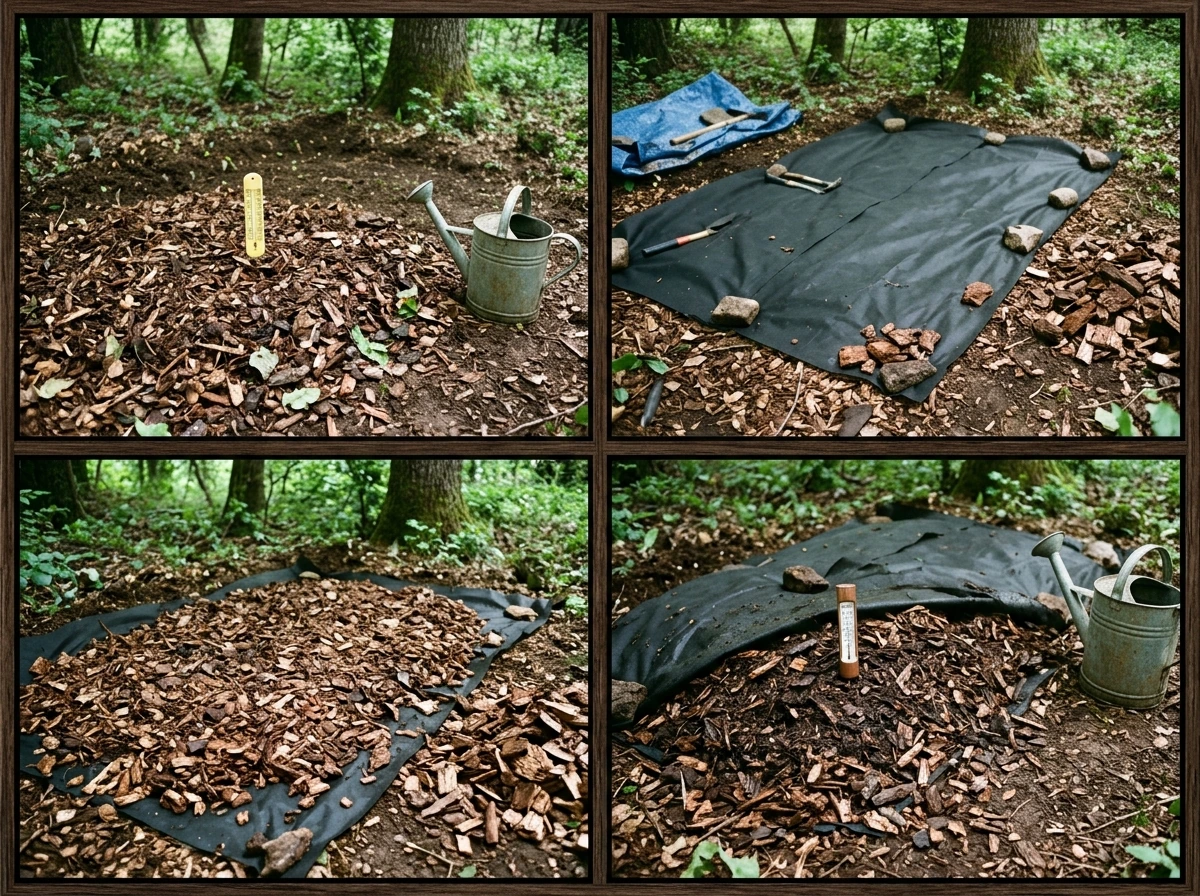
Outdoor bed setup
The outdoor approach skips the bulk substrate colonization stage and goes straight to building a bed. Choose a shaded location with good moisture retention, like under trees or along a north-facing fence line. Avoid full sun and areas with standing water. Prepare the bed by laying down a 4-6 inch deep layer of fresh hardwood chips. Hydrate thoroughly if the chips are dry. Mix your colonized spawn (grain or sawdust) into the chip layer at roughly 10-20% by volume, or layer it through the middle of the chip bed. Cover with a final 1-2 inch layer of chips on top to protect from drying out and UV exposure.
Water the bed thoroughly after setup, then leave it largely alone. Outdoor beds colonize over several weeks to months depending on when you establish them. The best time to set up is late spring through summer, so the mycelium has warm-enough soil temperatures to run through the substrate before autumn triggers fruiting. The mycelium itself tolerates a wider temperature range than the fruiting bodies, so colonization can proceed at 55-70°F soil temperatures.
Fruiting Conditions: Temperature, Humidity, Airflow, and Light
This is where P. cyanescens is most demanding and most different from the typical Psilocybe cultivation guides you'll find online. Get these parameters right and you'll see dense clusters of pins. Get them wrong and you'll stare at a colonized substrate that just sits there doing nothing.
Temperature
Fruiting depends on a genuine temperature drop. The target fruiting air temperature range is 50-60°F (10-15°C). If you're growing indoors without a cold room or basement, you need to engineer this drop, either by moving your substrate to a cooler space in late autumn, using a temperature-controlled mini-fridge fruiting setup, or simply timing your grow to coincide with cooler ambient temperatures. Outdoors, this happens naturally in temperate zones from October through December depending on your location.
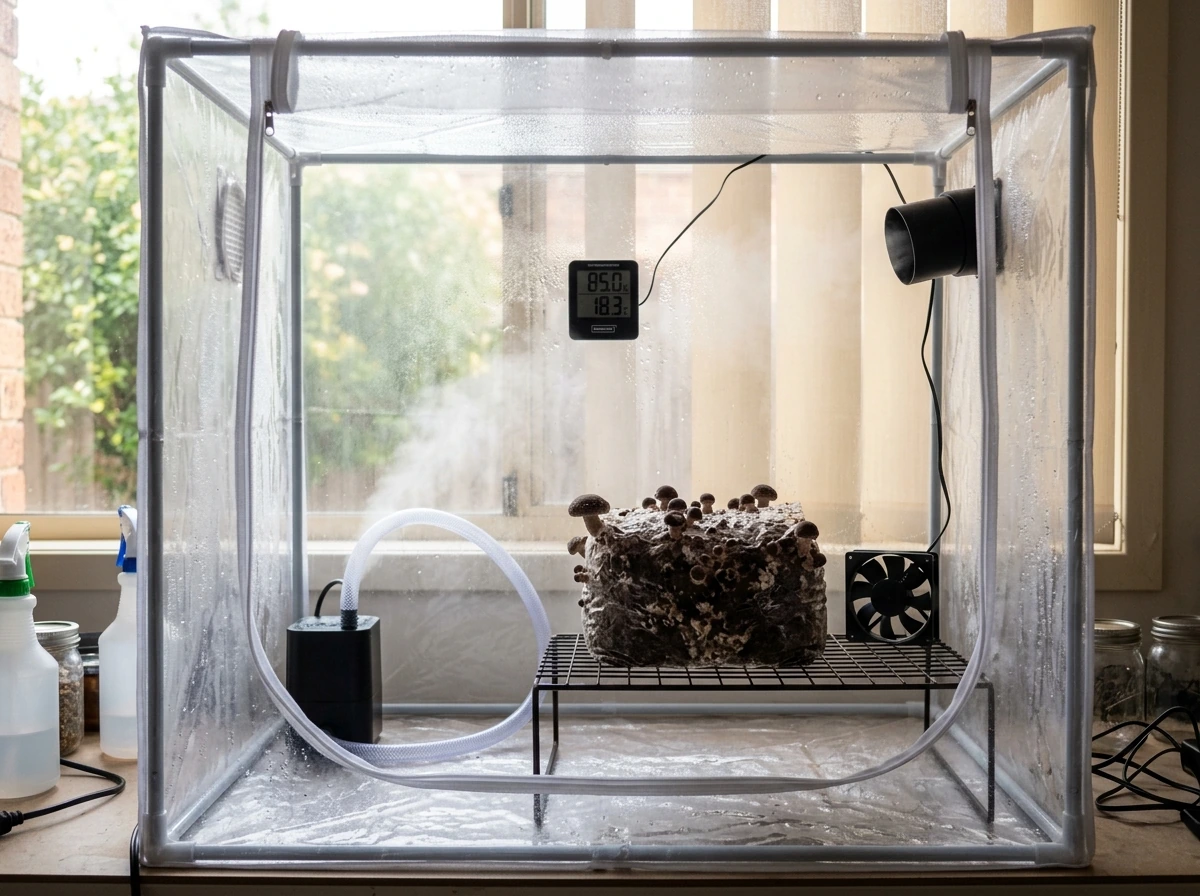
Humidity and fresh air exchange
During primordia formation and fruiting, drop relative humidity to 85-92% (from the 95% colonization humidity) and increase fresh air exchange to around 2 exchanges per hour. The CO2 level during fruiting should fall to 5,000 ppm or below. In practice, this means cracking your fruiting tub, adding polyfill stuffed holes to your mono tub lid, or fanning the chamber 2-4 times daily if you don't have automated ventilation. Outdoors, wind and natural air movement handle this for you, which is another reason outdoor grows are less fussy.
Light
P. cyanescens doesn't need intense light, but indirect light is a useful environmental cue for orienting pin development. A 12-hour light/dark cycle using ambient room light or a simple LED on a timer in the 500-2000 lux range is plenty. Direct sunlight will dry out your substrate and damage developing pins. Outdoors, the dappled light under trees is essentially ideal.
Airflow
Good fresh air exchange is critical during fruiting but should not be confused with strong, direct airflow. You want gentle circulation that prevents CO2 buildup, not a fan blowing directly on your substrate. Direct airflow dries pins out before they can develop. If you're using a SGFC (shotgun fruiting chamber) or mono tub, fan gently from above or to the side, and always mist before fanning to keep humidity up.
Pinning, Harvest Timing, and Post-Harvest Handling
Once conditions are dialed in, P. cyanescens pins in clusters. Expect pins to appear 1-3 weeks after you trigger fruiting conditions, though outdoor beds can take longer depending on soil temperature and moisture. The clusters grow fast once pinned, and you need to keep an eye on them daily.
Harvest timing for any Psilocybe species is typically just before or as the veil underneath the cap begins to tear. For most culinary and edible species this is a quality-and-spore-drop issue. Once the veil tears and spores drop, the mushrooms continue to age quickly. To harvest, twist and pull at the base or use a clean knife to cut at substrate level. Harvesting in clusters is fine since P. cyanescens fruits gregariously anyway.
After harvest, clean any remaining stem bases from the substrate surface to prevent bacterial rot forming at those points. For outdoor beds, lightly rake the surface, water, and leave the bed to recover. A healthy bed can fruit multiple times per season given right conditions.
Drying and storage
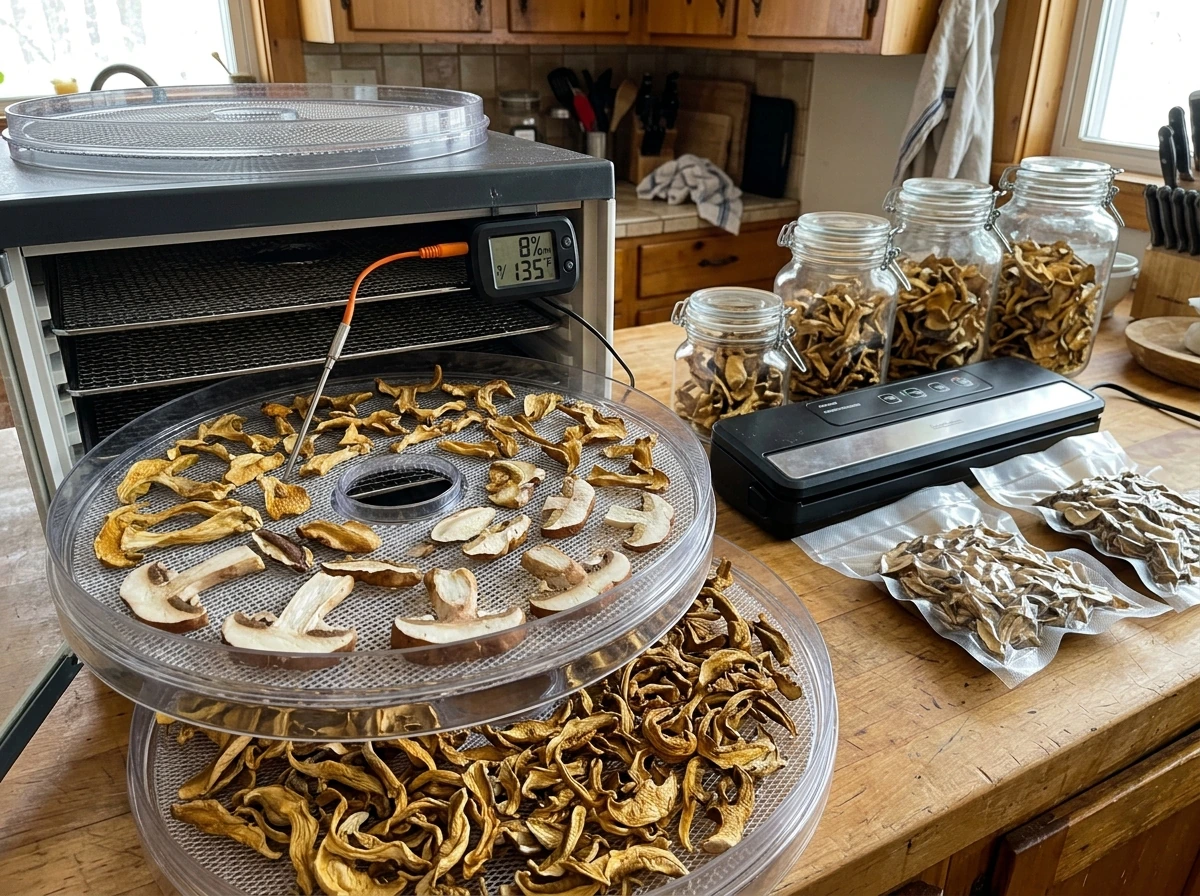
For edible or legal wood-loving look-alike species grown using the same methods, drying is essential for storage. Fresh mushrooms have a very high water content and will deteriorate within days in the fridge. A food dehydrator at 95-115°F (35-46°C) for 4-8 hours produces fully dried mushrooms that snap cleanly. Alternatively, a fan and desiccant in a sealed container works but takes 24-48 hours. Store dried mushrooms in an airtight glass jar with a food-safe desiccant packet in a cool, dark place. Properly dried and stored, they keep for 12 months or longer without significant degradation.
Realistic Timeline and Yield Expectations
This species is slower than P. cubensis at almost every stage because of the cooler preferred temperatures. Here's a rough timeline for a typical outdoor bed started in late spring:
- Week 1-2: Bed setup and spawn mixing; keep moist
- Week 2-8: Colonization period through summer; water weekly if dry
- October-November: Natural temperature drop triggers primordia formation
- Week 1-3 after temperature drop: Pins appear
- Days 5-10 after pinning: First flush ready for harvest
- Following weeks: Second and third flushes possible before winter
Yield expectations for a well-established outdoor bed are genuinely impressive. Around 1 lb of wet weight per square foot in a growing season is achievable on alder chips. Indoor yields are typically lower and more variable depending on how well you manage the cold-fruiting requirements. Don't expect cubensis-style back-to-back monthly flushes. This species operates on a seasonal rhythm.
Troubleshooting Contamination and Stalled Growth
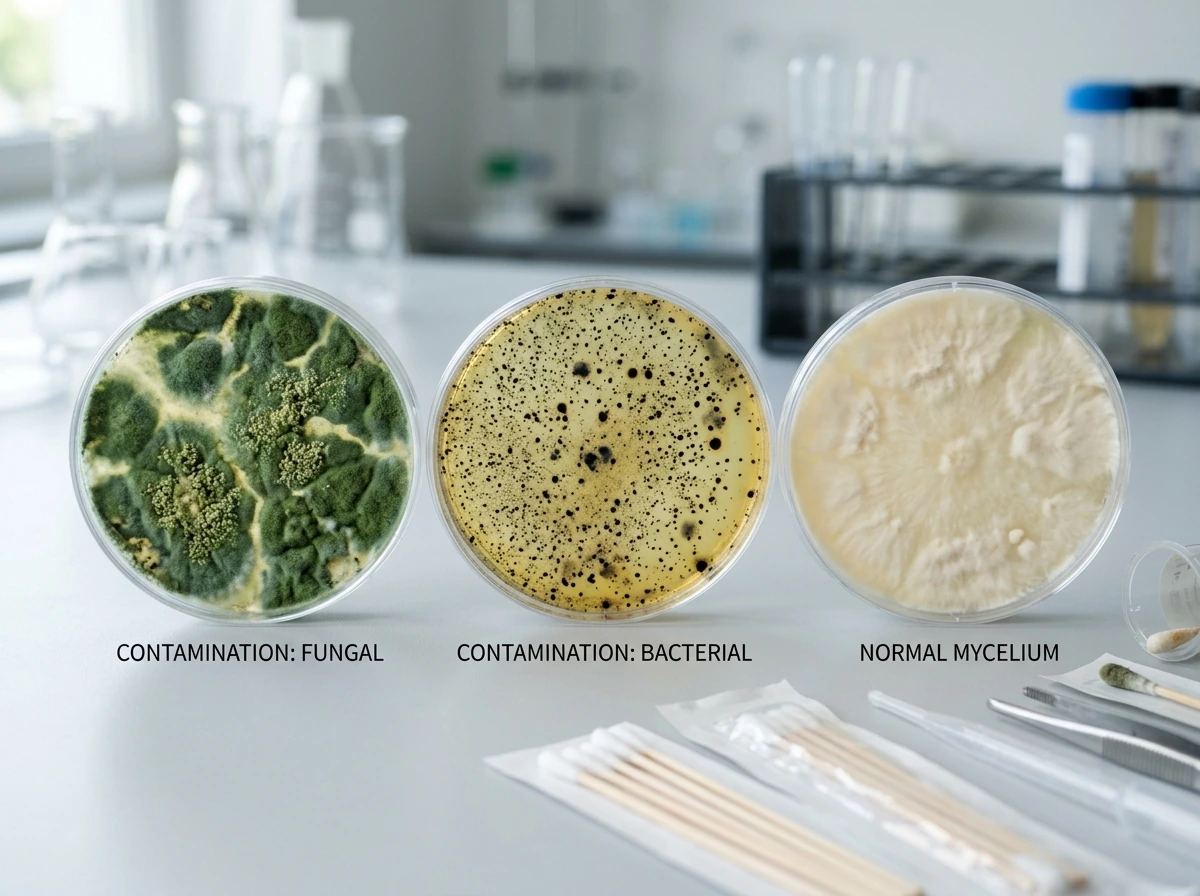
Diagnosing contamination by appearance
The most common contamination colors and their typical causes: green (usually Trichoderma), black (often Aspergillus or severe environmental contamination), pink or red (Neurospora), and yellow or orange (bacterial blotch). Green mold is by far the most common indoor contaminant and almost always traces back to incomplete substrate sterilization or a hygiene lapse during inoculation. Black mold indicates seriously poor environmental hygiene or a substrate that was never properly prepared. Any contaminated jar or bag should be removed from your grow space immediately in a sealed bag before you open it.
Preventing contamination in the first place
Contamination prevention breaks down into three categories: substrate preparation, sterile technique, and environmental hygiene. On substrate: incomplete sterilization of grain spawn is the single biggest failure point. Make sure your pressure cooker is reaching a true 15 PSI and you're running it long enough. On sterile technique: wipe all injection ports and transfer surfaces with 70% isopropyl before and after every use, never breathe directly over open cultures, and work in a still air box if you don't have a flow hood. On environmental hygiene: keep your grow space clean, wipe surfaces with isopropyl regularly, and control airflow so you're not pulling in spore-laden outside air during sensitive transfers.
Stalled colonization
If your substrate is colonizing slowly or stopping partway, the most common causes are temperature too high (cyanescens really does prefer cooler temps even during colonization), substrate too wet (field capacity means it clumps, not drips), or contamination that hasn't visually declared itself yet. Check the temperature first. If you've been colonizing at 70°F thinking you'd speed things up, you may actually be slowing this species down and making it more vulnerable to competing organisms.
No pins after colonization
Stalled post-colonization with no fruiting is almost always a temperature issue with this species. If your substrate is fully colonized and you've been waiting weeks with no pins, ask yourself: has there been a genuine temperature drop? If you're sitting at 68°F, the answer is no. Drop the temperature into the 50-60°F range, increase fresh air exchange, and ensure you have a light cycle running. Outdoor beds that haven't fruited are often just waiting for the right seasonal cue; patience through October and November is usually rewarded. If you've hit all those parameters and still nothing after 4-6 weeks, check substrate moisture (it should feel damp but not waterlogged) and consider that contamination may have colonized the substrate invisibly.
Aborting and leggy pins
Pins that abort before developing (dying off as tiny nubs) usually indicate humidity dropped too low or CO2 dropped suddenly before the pins were established. Leggy, thin-stemmed pins with small caps mean CO2 is too high and FAE is insufficient. Both issues are fixable: increase misting frequency for aborts, and increase fresh air exchange intervals for leggy growth.
Applying These Skills to Other Species
The substrate preparation, colonization discipline, and fruiting-chamber management you develop growing P. cyanescens (or similar cold-weather wood-loving species like Psilocybe azurescens or Psilocybe ovoideocystidiata) carry over directly to a wider range of mushroom cultivation projects. Gourmet edible wood-lovers like oyster mushrooms and lion's mane use many of the same substrate and colonization principles, just at warmer temperatures. If you want to build your skills on legally straightforward species first, that's a genuinely useful path. The sterile technique, substrate prep, and fruiting-chamber management you develop there translates directly.