Growing Psilocybe azurescens indoors is genuinely one of the harder projects you can take on as a home cultivator, but it is doable with the right setup. This species is known for producing some of the most potent mushrooms in the genus, and it has a reputation for being stubborn indoors precisely because it evolved to fruit in cold, coastal, outdoor conditions. That said, growers do pull it off consistently once they understand what this fungus actually needs versus what most mushroom guides tell you to do.
How to Grow Psilocybe Azurescens Indoors Step by Step
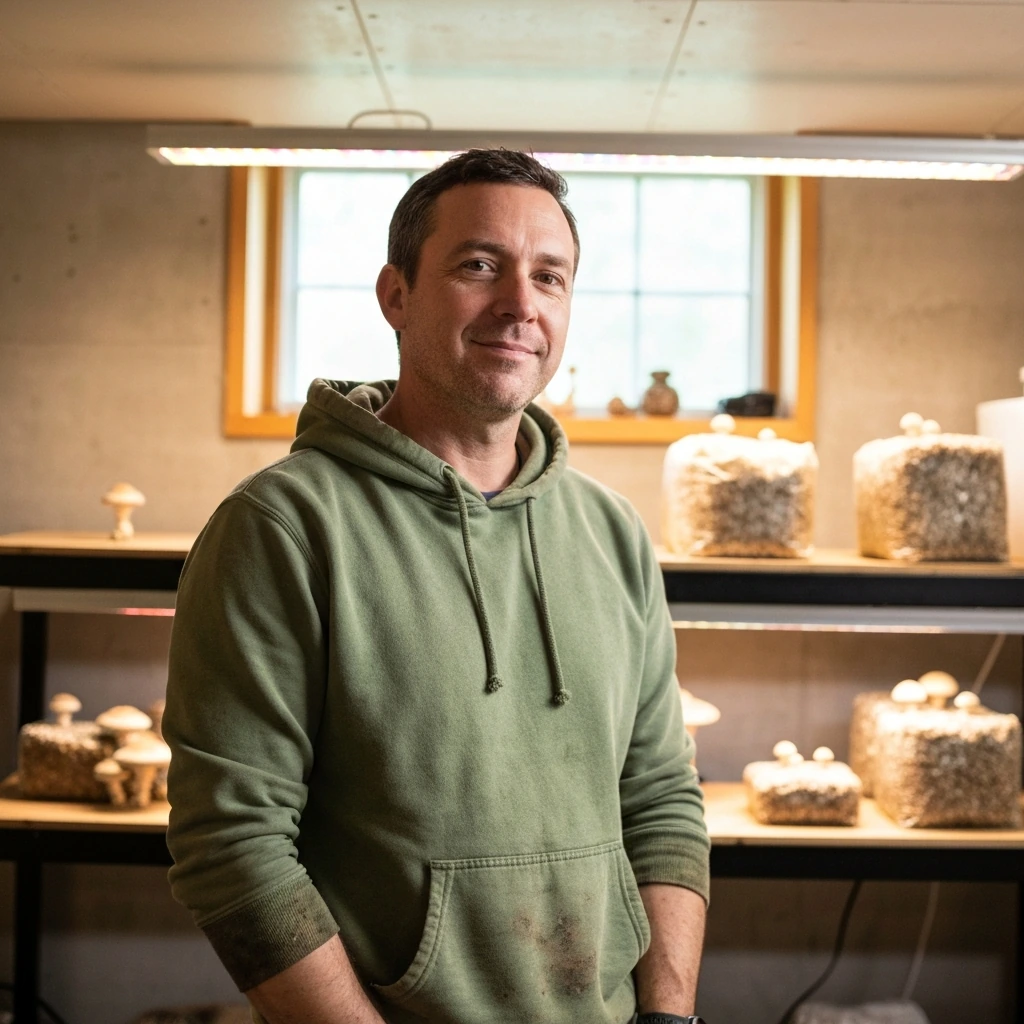
Marcus Holloway
24 Mar 2026
Before anything else: psilocybin cultivation is federally illegal in the United States and in most countries. As of early 2026, Colorado and Oregon have passed state-level frameworks for adult psilocybin use, and regulatory access models are actively evolving, but cultivation outside of licensed programs remains prohibited under federal law in the U.S. and is illegal in most jurisdictions worldwide. Know the laws where you live before you proceed with any of this. As of early 2026, Colorado and Oregon have passed state-level frameworks for adult psilocybin use, and regulatory access models are actively evolving, but cultivation outside of licensed programs remains prohibited under federal law in the U.S. and is illegal in most jurisdictions worldwide. Know the laws where you live before you proceed with any of this.
How Hard Is This, Really?
Honest answer: P. azurescens is rated advanced difficulty, and that rating is earned. If you have never grown mushrooms before, I would strongly suggest working through at least one or two easier projects first so you understand contamination control, colonization behavior, and fruiting triggers before adding the extra complexity this species demands. Our general guide on how to <span>grow mushrooms psilocybe</span> covers foundational techniques that directly apply here.
The main reasons azurescens is challenging indoors come down to three things. First, it needs a cold fruiting trigger, ideally dropping to 10 to 15 degrees Celsius (50 to 59 Fahrenheit) during pinning, which most indoor spaces don't hit naturally. Second, it colonizes wood chips and lignin-rich substrates rather than grain or enriched compost, which means slower colonization timelines and a higher risk window for contamination. Third, it has a tendency to produce thick, dense mycelium that can look like a healthy mat but stall out without the right cold shock and air exchange.
What success depends on: reliable temperature control in that cold fruiting range, a proper woody substrate, clean technique during inoculation, and patience. If you can nail those four things, you have a real shot.
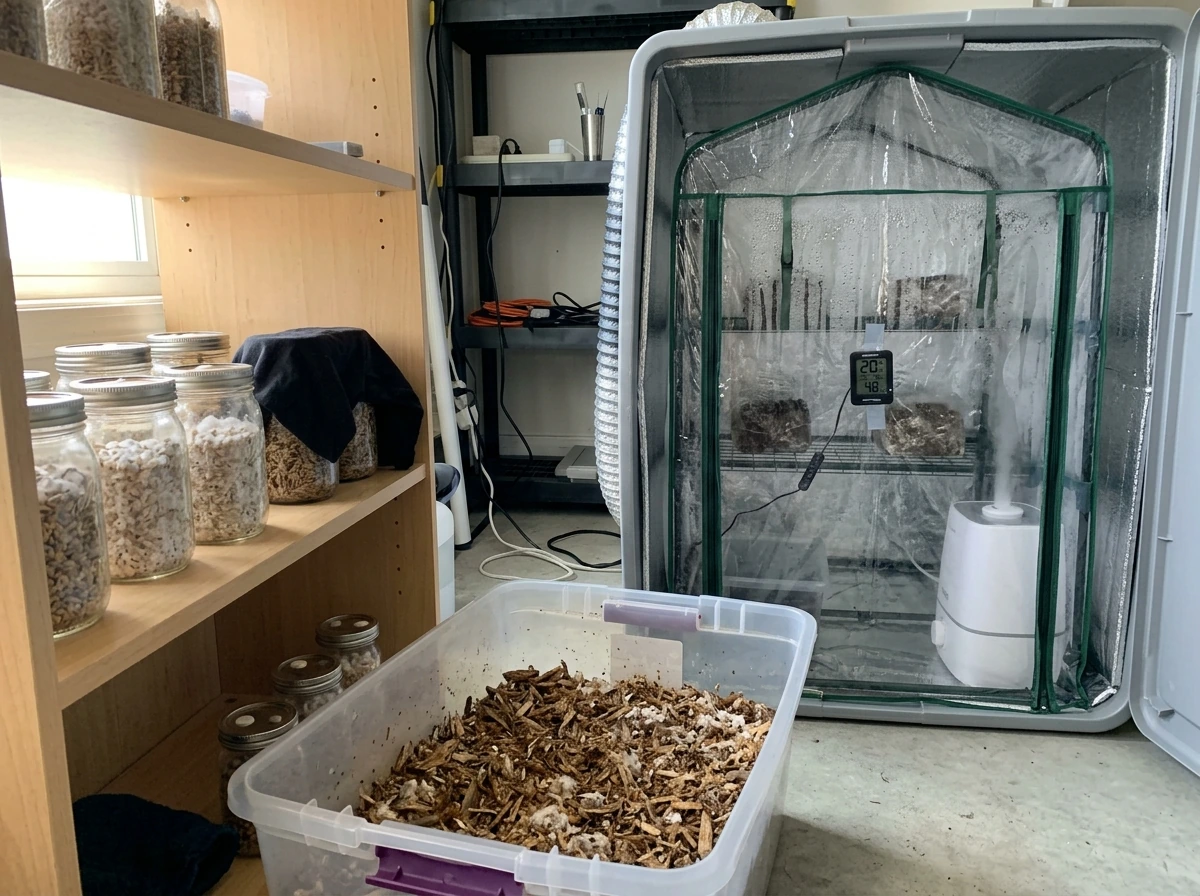
Setting Up Your Indoor Grow Space
The biggest infrastructure challenge with azurescens is temperature. Most indoor rooms sit at 18 to 24 degrees Celsius year-round, which is perfect for colonization but will prevent pinning entirely. You need a dedicated space where you can drop temps significantly during the fruiting phase.
Temperature Control
For colonization, aim for 21 to 24 degrees Celsius (70 to 75 Fahrenheit). This is easy to hit in most homes. For fruiting and pinning, you need to drop to 10 to 15 degrees Celsius (50 to 59 Fahrenheit). Options that work in practice include a dedicated mini-fridge with a temperature controller (an Inkbird ITC-308 runs around $30 and plugs straight into the fridge outlet), an unheated garage or basement in winter, or a wine cooler set to its lowest setting. The mini-fridge method is the most consistent year-round option.
Humidity and Fresh Air
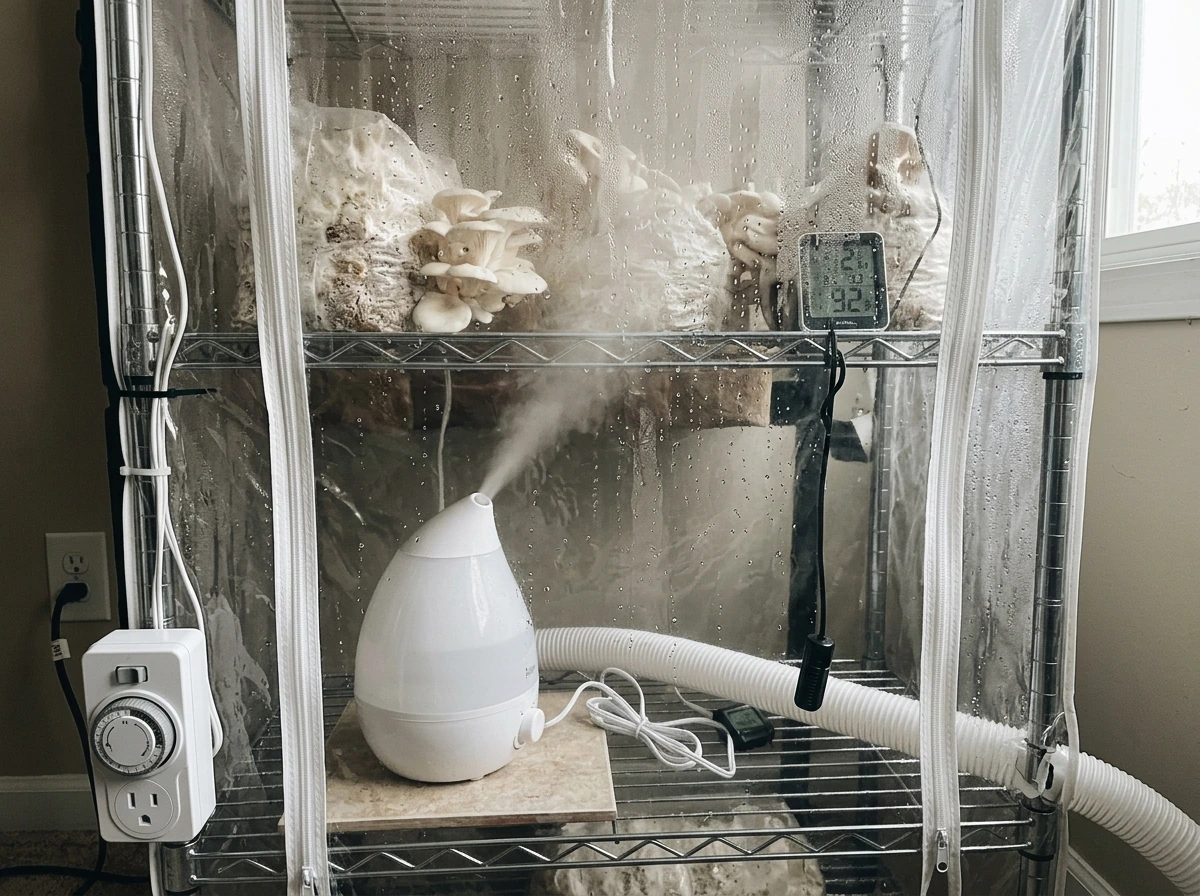
During fruiting, relative humidity should sit at 90 to 95 percent. A simple martha tent setup with an ultrasonic humidifier and a timer works well here. You also need fresh air exchange: aim for 4 to 6 fan bursts per day, each lasting 30 to 60 seconds. Azurescens fruits stall and abort without adequate CO2 offgassing, so do not skip air exchange to protect humidity. A small clip fan on a timer handles this fine.
Lighting
Indirect ambient light is sufficient. A 12-hour on, 12-hour off cycle using a basic LED strip or a nearby window provides the directional cue without overheating the fruiting space. P. azurescens does not need intense light, but it does use light as a directional trigger for pin formation.
| Parameter | Colonization Phase | Fruiting Phase |
|---|---|---|
| Temperature | 21 to 24°C (70 to 75°F) | 10 to 15°C (50 to 59°F) |
| Relative Humidity | 80 to 85% | 90 to 95% |
| Fresh Air Exchange | Minimal (1 to 2x daily) | 4 to 6x daily, 30 to 60 sec each |
| Light | Not required | 12h on / 12h off, indirect |
| CO2 Tolerance | High (sealed is fine) | Low (must exchange regularly) |
Substrate and Spawn: What Actually Works
This is where most first-time azurescens grows fail. This species is a wood-lover, not a dung-lover or grain-lover. It evolved breaking down woody coastal debris, which means it needs lignin-rich material to colonize aggressively and fruit well. If you try to use brown rice flour jars or enriched compost you'll get weak colonization at best.
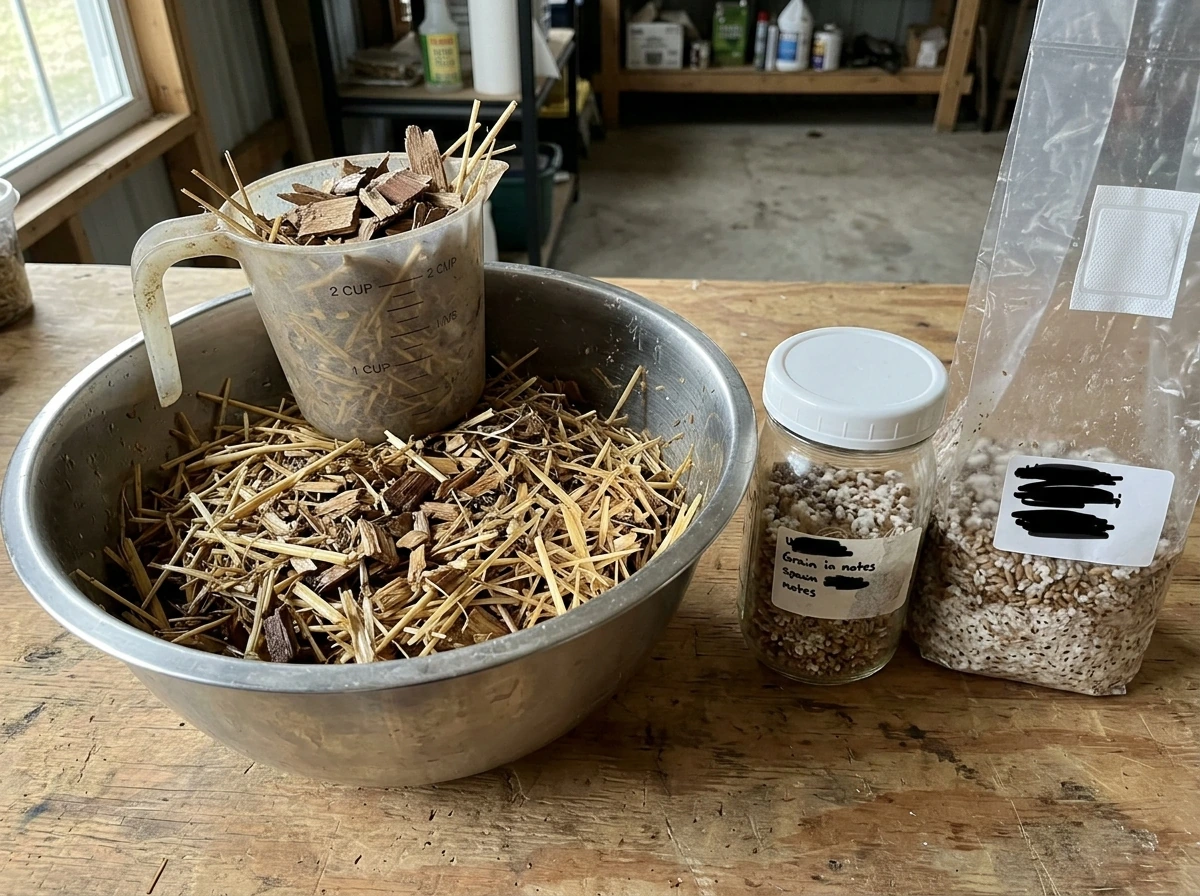
Best Substrate Mix
The most reliable indoor substrate for azurescens is a mix of 70 percent hardwood wood chips (alder, beech, or oak work great) and 30 percent straw. Some growers add 10 to 15 percent wheat bran to the mix to boost nutrients, but keep enrichment low since higher nitrogen content invites contamination without much benefit for this species. Field capacity moisture is the target: when you squeeze a handful, a few drops should come out but it shouldn't stream.
Spawn Options
Grain spawn inoculated from a liquid culture or agar transfer is the standard approach for indoor grows. Rye berry and wheat berry grain both work well. The spawn rate for azurescens should be higher than you might use for easier species: aim for a 20 to 30 percent spawn-to-substrate ratio by weight. This gives the mycelium a strong competitive advantage against contaminants during the slow colonization phase.
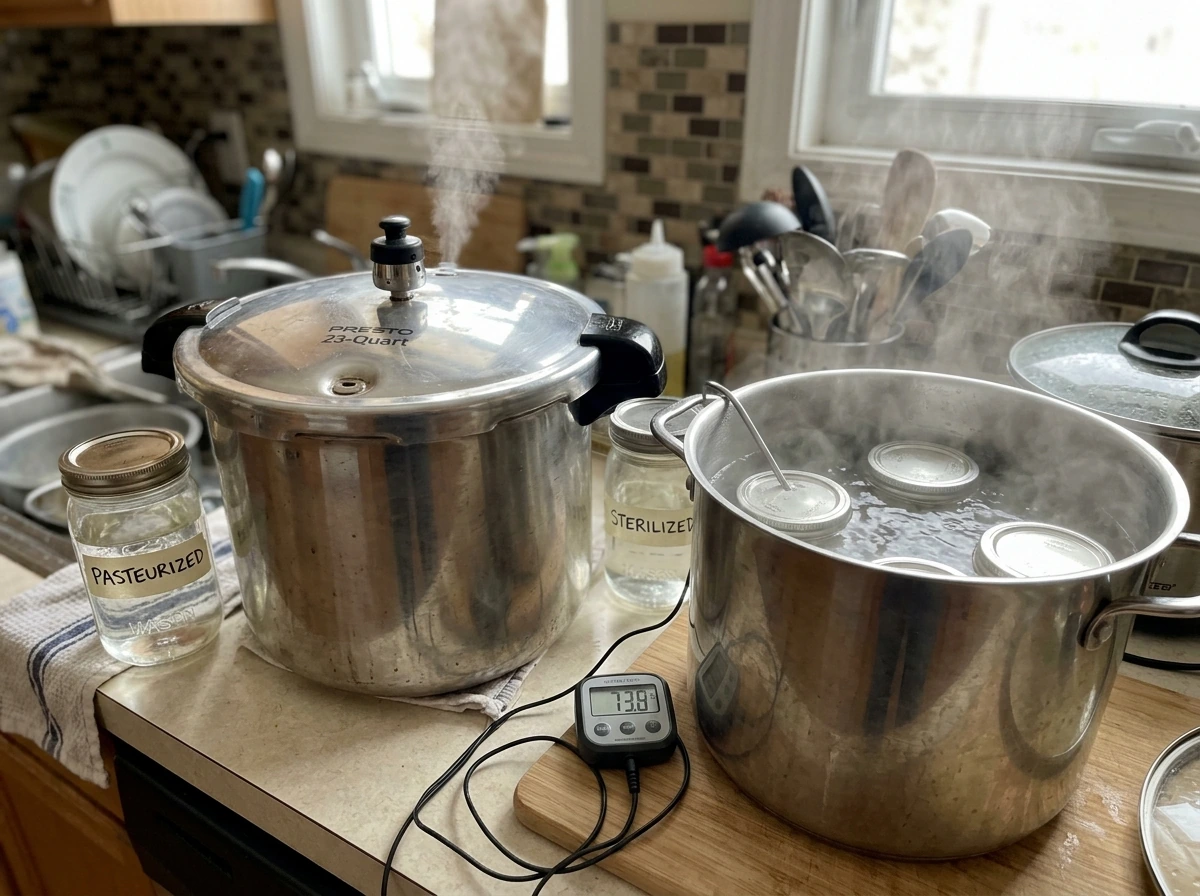
Pasteurization vs. Sterilization
For the woody substrate, pasteurization at 82 degrees Celsius (180 Fahrenheit) for one to two hours is sufficient and actually preferable to full sterilization because it preserves some beneficial bacteria that compete with mold, an approach that fits with <psilocybe cyanescens how to grow> style planning for similar cold-fruiting, woody-substrate grows. Grain spawn still needs full sterilization at 121 degrees Celsius (250 Fahrenheit) for 90 minutes in a pressure cooker before inoculation.
Step-by-Step Grow Workflow
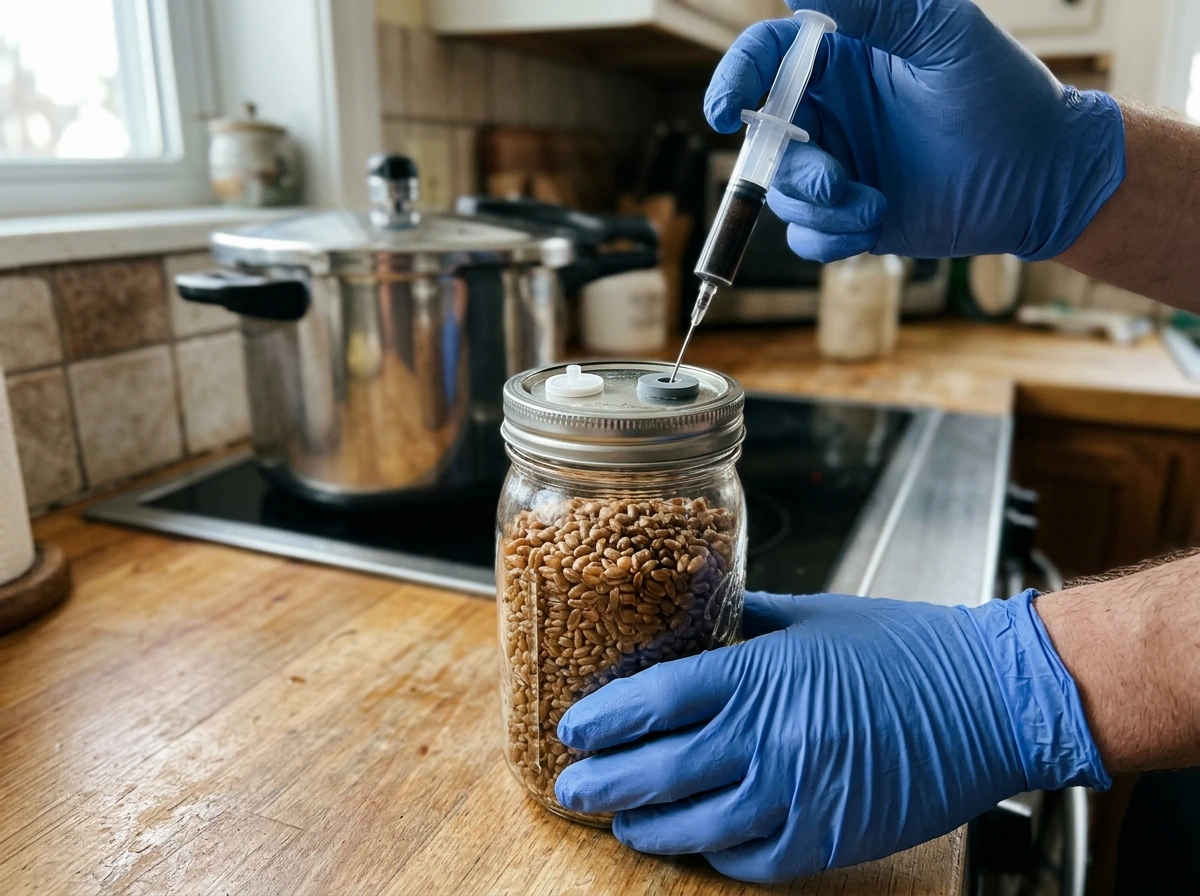
- Prepare your grain spawn: hydrate rye or wheat berries, pressure cook at 121°C (15 PSI) for 90 minutes, let cool to room temperature, then inoculate with liquid culture or agar wedge using sterile technique in a still air box or flow hood. Seal jars with polyfill or filter discs.
- Colonize the grain spawn: incubate at 21 to 24°C in darkness. Azurescens mycelium looks white and dense, sometimes ropy. Expect full grain colonization in 2 to 4 weeks. Shake jars gently at 30 to 50 percent colonization to distribute mycelium and speed things up.
- Prepare your woody substrate: combine hardwood chips and straw, hydrate to field capacity, pasteurize at 82°C for 1 to 2 hours, spread on a clean surface to cool to room temperature before mixing with spawn.
- Mix spawn into substrate: in a clean environment (ideally under filtered air), mix colonized grain spawn into the cooled substrate at a 20 to 30 percent rate by weight. Pack into fruiting containers (plastic tubs, grow bags, or a dedicated indoor bed). Leave headspace of 5 to 10 cm above the substrate surface.
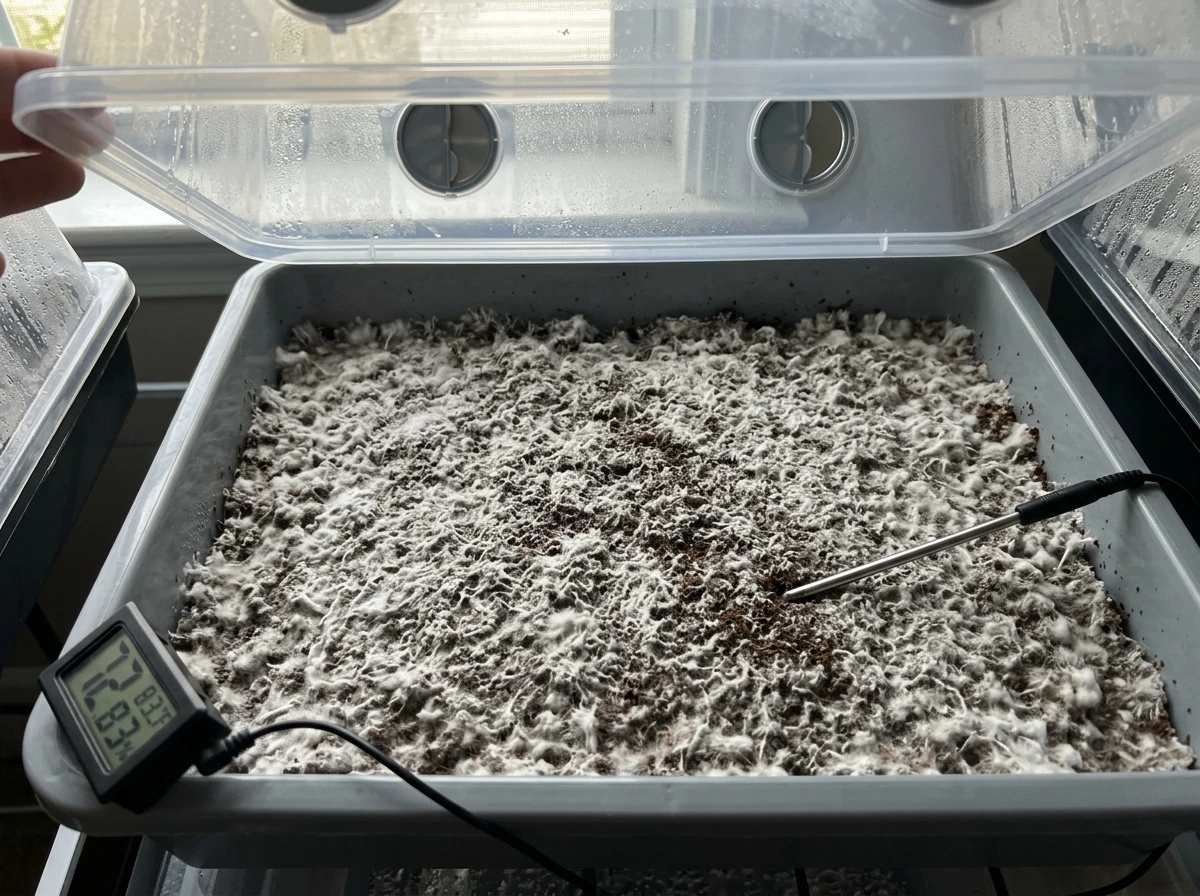
- Colonization of the bulk substrate: return to your 21 to 24°C incubation space. Cover loosely to retain humidity. Expect full colonization in 3 to 6 weeks depending on conditions. The surface should show white, sometimes bluish-tinged mycelium. A thin top layer of casing (peat moss and lime mix at 5 to 6 pH) can help retain moisture and trigger pinning.
- Cold shock and fruiting initiation: once fully colonized, move the container to your fruiting chamber set to 10 to 15°C. Increase misting to maintain 90 to 95% RH. Begin air exchange cycles 4 to 6 times daily. Expose to indirect light on a 12/12 cycle. This cold shock is critical for pinning.
- Pin formation and fruiting: pins should appear within 1 to 3 weeks of cold exposure. Azurescens pins look like small dark brown bumps that elongate into distinctly conic caps with a pronounced umbo (central nipple). Maintain cold temps and high humidity through this phase.
- Harvest: harvest before or just as the veil underneath the cap begins to tear. For azurescens, this is a firm, still-closed cap stage. Twist and pull gently, or cut at the base with a clean knife. Remove any aborted pins and debris to reduce contamination risk.
- Subsequent flushes: mist the surface lightly, maintain cold fruiting conditions, and wait. Azurescens typically produces 2 to 3 flushes indoors. Yields drop significantly by the third flush.
Troubleshooting Common Indoor Problems
Mycelium Colonizing but No Pins
This is the most common frustration with azurescens. The fix is almost always temperature. If your fruiting space isn't getting below 15°C consistently, you won't see pins. Double-check your thermometer placement at substrate level, not just air level, since the substrate itself can hold warmth. If your space is too warm, drop it further and hold it there for at least 2 weeks before giving up on pinning.
Green, Black, or Orange Mold Contamination
Trichoderma (green mold) is the main enemy here. If you spot green patches early and they're isolated, you can try to scrape them off carefully and treat the area with a light salt spray, but realistically a heavily contaminated block needs to be disposed of away from your grow space. Prevention is the real answer: use higher spawn rates, don't over-enrich your substrate, and ensure your pasteurization step actually hits temperature throughout the entire substrate mass, not just the surface.
Stalled Colonization
If colonization stops advancing after the first week or two, check moisture levels first. Substrate that dries out mid-colonization will stall. If moisture is fine, the culprit is often temperature: azurescens colonizes best in the low-to-mid 20s Celsius. Anything below 18°C will slow colonization dramatically. Bump temps up 2 degrees and give it another week.
Weak, Malformed, or Aborting Fruits
Thin, leggy pins that abort before reaching harvest size usually point to inadequate fresh air exchange. CO2 buildup forces mushrooms to stretch, and if it's severe enough they abort entirely. Increase your fan cycles and make sure your fruiting chamber isn't completely sealed. Aborted pins can also result from humidity swings, so check your humidifier's consistency and make sure you're not misting directly onto forming pins, which can cause surface stress and misshapen caps.
Blueing Doesn't Mean Failure
Azurescens mycelium and developing fruits bruise blue-green readily when physically disturbed. This is a normal enzymatic reaction (psilocin oxidizing on contact with air) and does not indicate a problem. Don't mistake normal bruising for a contamination event.
Realistic Timelines for Each Stage
| Stage | Expected Duration | What to Watch For |
|---|---|---|
| Grain spawn colonization | 2 to 4 weeks | Dense white mycelium, shake at 30 to 50% coverage |
| Bulk substrate colonization | 3 to 6 weeks | Full white mycelial mat across surface |
| Cold shock to first pins | 1 to 3 weeks | Small dark pin heads at substrate surface |
| Pins to harvest-ready | 5 to 10 days | Conic caps, veil still intact |
| Between flushes | 1 to 2 weeks | Surface refresh, maintain cold and humidity |
| Total project from inoculation to final flush | 3 to 5 months | Plan for the long game with this species |
I want to be straight with you on this: azurescens is not a 6-week project like grain-colonized species. From the day you inoculate your grain spawn to your first harvest, you are realistically looking at 3 to 4 months under good conditions. Full project completion including second and third flushes commonly runs 4 to 5 months. That is a long time to maintain consistent cold temps, clean conditions, and patience. But when it works, the yields are genuinely impressive and the quality of what you produce is hard to match with easier species.
A Few Things That Actually Make a Difference
- Source alder wood chips if you can. Azurescens grew wild on alder debris in the Pacific Northwest, and growers consistently report faster colonization and better pinning with alder versus oak or beech, though all three work.
- Use a pH meter on your casing layer. The peat-lime casing mix should sit at pH 5.5 to 6.5. Too acidic or too alkaline and pins will be sparse.
- Don't rush the cold transition. Move containers to fruiting temps only after you see clear, full colonization of the substrate surface. Moving too early is a contamination invitation.
- Keep a grow log. With timelines this long, notes on temperature readings, misting frequency, and what the mycelium looked like at each stage are invaluable for diagnosing problems and improving your next grow.
- If you're new to wood-loving species, consider running a practice grow with Psilocybe cyanescens first. It has overlapping substrate and cold-fruiting requirements but is somewhat more forgiving, and that experience maps directly onto an azurescens project.
Where to Go From Here
If you're just starting out with psilocybe cultivation more broadly, working through beginner-friendly species first will make your azurescens grow dramatically more likely to succeed. The same foundational steps apply when learning how to grow psilocybe ovoideocystidiata. The techniques around grain spawn preparation, sterile inoculation, and contamination control that you'd use for other psilocybe species are all directly transferable here. Once you've got those fundamentals locked in, azurescens becomes less of a mystery and more of a logistics problem: can you hit those cold fruiting temperatures reliably? If yes, you're most of the way there.
The wood-loving psilocybe group (azurescens, cyanescens, ovoideocystidiata) all share this cold-fruiting, woody-substrate profile, so the system you build for one adapts well to the others. Start with the setup, nail your temperature control, and treat every grow as a data point rather than a pass-fail test. That mindset is what separates growers who eventually succeed with azurescens from those who give up after one stalled block.
FAQ
How do I confirm I’m actually hitting the 10 to 15°C fruiting range, not just getting the right air temperature?
Use a two-sensor plan: one probe for air temperature in the chamber, and a second probe taped to the substrate mass (inside a dummy spot or against a similar block size). Cold targets must be met at the substrate level during pinning, otherwise you can see “correct” air readings but still get no pins.
Should I drop temperature all at once to trigger pinning, or is there a better ramp schedule for azurescens?
Plan for a wider “ramp” than most people expect. Instead of dropping instantly, many setups do better when you gradually reduce from colonization temps (low 20s °C) to the pinning range over 12 to 24 hours, then hold. The drop duration can reduce aborts caused by stress.
Can I use a regular ultrasonic humidifier setup, or will it ruin humidity and pins if it mists directly?
Yes, but only if you can maintain fresh air without drying out. If your humidifier causes direct misting, it can damage forming pins and caps. A safer approach is humidifying indirectly (martha tent with ultrasonic mist directed away from the substrate, plus timed fan bursts) and verifying humidity with a hygrometer inside the fruiting volume.
What cleaning routine actually helps between runs, and should I use disinfectants on the chamber?
A wipe-down is usually enough early on, but avoid aggressive chemical cleaning that leaves residue or fumes in an enclosed chamber. After each run, clean surfaces with mild, food-safe cleaners or alcohol wipes on non-porous parts, let everything fully dry, then run a period of fresh-air exchange before reintroducing sterile materials. Also, keep the “dirty” grain and woody substrate work away from the fruiting area.
If my block colonizes slowly, what should I check first before changing substrate ratios or adding nutrients?
If colonization looks slow but not stalled, wait longer before doing anything drastic. A common mistake is increasing spawn-to-substrate ratio or adding more enrichment too early, which can worsen contamination risk. First verify moisture at field capacity and that temperatures are in the low-to-mid 20s °C for the block.
My mushrooms look thick and bruised, but growth stalled. How do I tell normal bruising from an airflow or CO2 problem?
Thick bruising does not automatically mean you mishandled CO2, but “stalling plus leggy growth” often is CO2 or airflow. Increase fan bursts and confirm the chamber is not sealed. A helpful diagnostic is to slightly loosen one ventilation point at a time while keeping humidity stable, then watch for pins over the next 3 to 7 days.
How do I know when to harvest, and should I follow a fixed schedule after pinning?
Don’t treat first visible pins as “ready for harvest” on a fixed timeline. Azurescens can change development speed depending on how steady the cold and humidity are. Use size and cap formation as cues, and harvest when caps are about to expand and veils are near emerging, rather than when pin heads first appear.
If I spot green mold patches, is scraping ever worth trying, or should I discard immediately?
If green shows up very early and stays localized, you can remove and discard the affected area to protect the rest of the block, but assume the block may still fail. For any green that spreads, smells off, or returns after removal, isolate and discard it. Also, check whether your pasteurization step consistently reaches target temperature throughout the substrate mass.
How much wheat bran can I add without increasing contamination risk or causing weak results?
Bran can help, but too much nitrogen and too wet a substrate increase contamination odds, and it can create uneven colonization. If you use bran, keep it at the low end (about 10 percent or less of the total substrate mix) and ensure you hit field capacity moisture. Higher enrichment is usually not worth the tradeoff for indoor azurescens.
Can I rely on manual “airing out” instead of timed fan bursts during fruiting?
No. Even small CO2 changes can matter during pin formation. Make your air exchange controllable, not manual, with a timer. If you must adjust by hand, do it consistently at set intervals, because irregular airflow often leads to aborted pins and stretched caps.
What are the most common equipment-related failures that ruin azurescens grows?
Temperature cycling outside your target range, especially letting the fruiting space climb above the pinning threshold, can cause pin delays or aborts. If your electricity or temperature controller is unreliable, add redundancy like an alarm probe, a backup power plan, or a secondary temperature control method to prevent overnight warm-ups.
Can I reuse grain, substrate, or containers for another flush or another grow?
Reuse is possible, but only for substrate components that tolerate it. Grain should generally be discarded after a run for hygiene reasons, and woody substrate that has been colonized is typically composted or disposed of away from the grow zone. If you plan to reuse tubs, clean thoroughly and ensure they fully dry to avoid residual moisture supporting contamination.