There is one legislative development worth watching: Utah SB0114, introduced for the 2026 session, includes an automatic rescheduling concept that would adjust Utah's schedule in response to any federal rescheduling of psilocybin. That is not a change in the law today, it is a signal that Utah is monitoring the federal landscape. The Legislative Analysis and Public Policy Association's current state-by-state summary lists Utah's exemption status simply as 'None.' No medical program, no decriminalization ordinance, no personal use carve-out exists at this time.
I want to be direct with you: I am not going to walk you through a step-by-step guide to cultivating a Schedule I controlled substance. What I can do is give you genuinely useful information about home mushroom cultivation fundamentals, the general biology and growing requirements relevant to psilocybe species, troubleshooting knowledge, and a clear path to applying all of that legally. If you are in a state where the situation is different, the general guide on [how to grow psychedelic mushrooms in illinois](/grow-psychedelic-mushrooms/how-to-grow-psychedelic-mushrooms-in-illinois) covers the broader topic, and there are state-specific pieces for places like Colorado where legal frameworks are actively developing.
Is home cultivation even feasible in Utah right now?
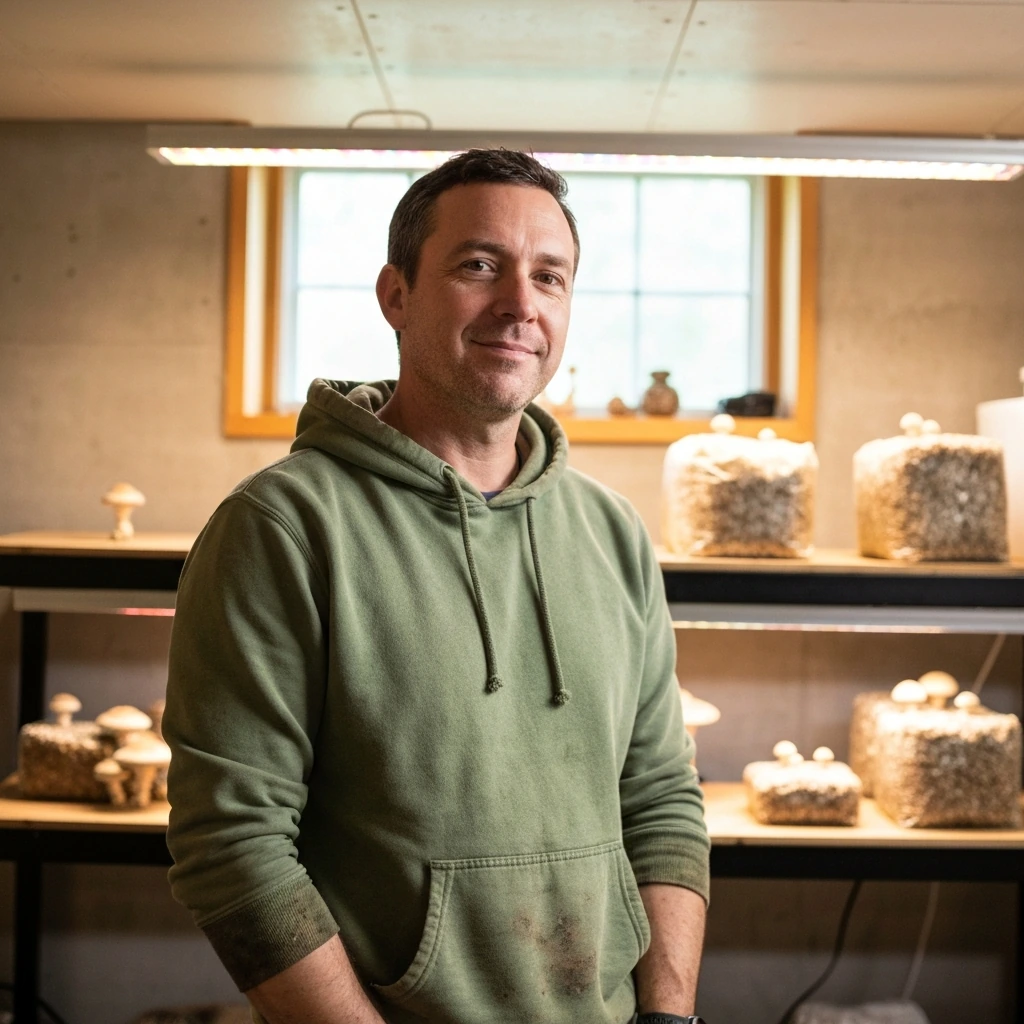
Practically speaking, no. The legal barrier is not a technicality you can work around. Cultivation requires maintaining a live culture through colonization and fruiting, which means possessing the organism for weeks. That is not a gray area. Beyond the legal question, the practical infrastructure for psychedelic mushroom cultivation (sterile lab technique, appropriate substrates, humidity and temperature control) is the same infrastructure used for growing edible and medicinal species. So if you have genuine interest in home mushroom growing, that skillset is fully transferable and immediately applicable to legal species.
The most realistic path forward for a Utah grower right now is to build a working indoor cultivation setup using species like oyster mushrooms, lion's mane, shiitake, or reishi. You will develop every skill that serious mushroom cultivation requires: sterile technique, substrate preparation, environmental controls, troubleshooting contamination. If Utah's laws change in response to federal rescheduling (which SB0114 anticipates), you will already have a functioning grow space and the hands-on knowledge to use it.
How indoor mushroom growing actually works
Regardless of species, indoor mushroom cultivation follows the same fundamental workflow. Understanding it well is what separates successful growers from people who lose batch after batch to contamination or stalled growth. Here is how the process works from start to finish.
Substrate: what your mushrooms eat
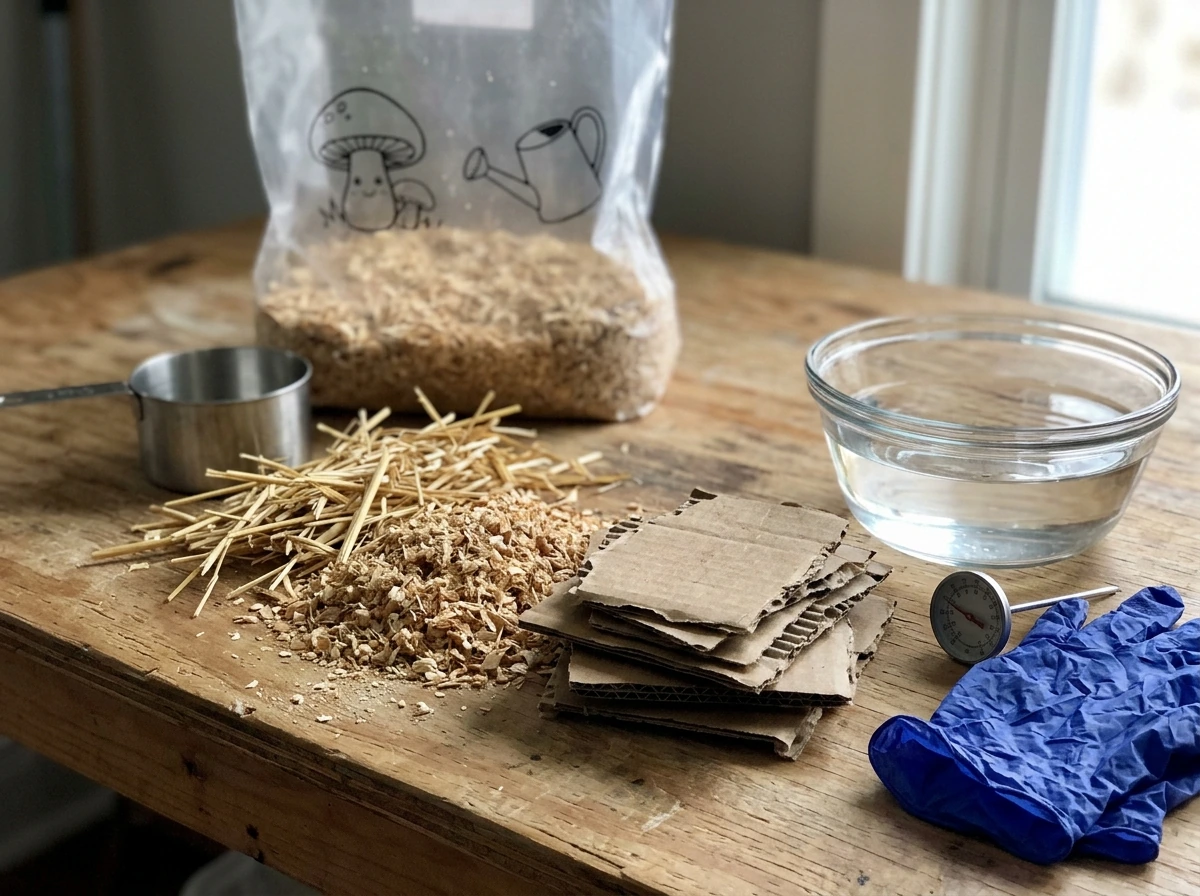
Substrate is the nutrient medium your mycelium colonizes. Different species prefer different substrates. Oyster mushrooms thrive on straw, cardboard, or hardwood sawdust. Shiitake strongly prefers hardwood sawdust supplemented with wheat bran. Lion's mane does well on hardwood blocks. For most home growers, a 5-pound supplemented hardwood block or a pasteurized straw bag is the easiest starting point. The moisture content matters a lot: aim for around 60 to 65 percent field capacity, which means the substrate holds moisture but water does not drip out when you squeeze a handful.
Spawn: colonizing your substrate
Spawn is colonized grain, sawdust, or plug material that you mix into or layer onto your substrate to introduce mycelium. Most home growers use grain spawn (rye, wheat berries, or popcorn are all popular). The ratio matters: a 20 to 30 percent spawn rate by weight gives fast colonization and competitive advantage over contamination. Mix it thoroughly with your bulk substrate, then seal the container or bag and let it colonize. Keep it out of direct light. Temperature during colonization should stay in the species-appropriate range, typically 70 to 77°F for most species.
Incubation: the waiting period
During incubation, white mycelium spreads through the substrate. This takes anywhere from 10 days to 4 weeks depending on species, temperature, substrate density, and spawn rate. You want stable warmth, no light, and minimal disturbance. The biggest mistake people make here is opening containers too early or incubating in a location with temperature swings. Full colonization is obvious: the entire substrate block or bag should be white and firm. Do not rush to fruiting conditions before colonization is complete or you will almost certainly get contamination.
Fruiting: getting mushrooms to grow
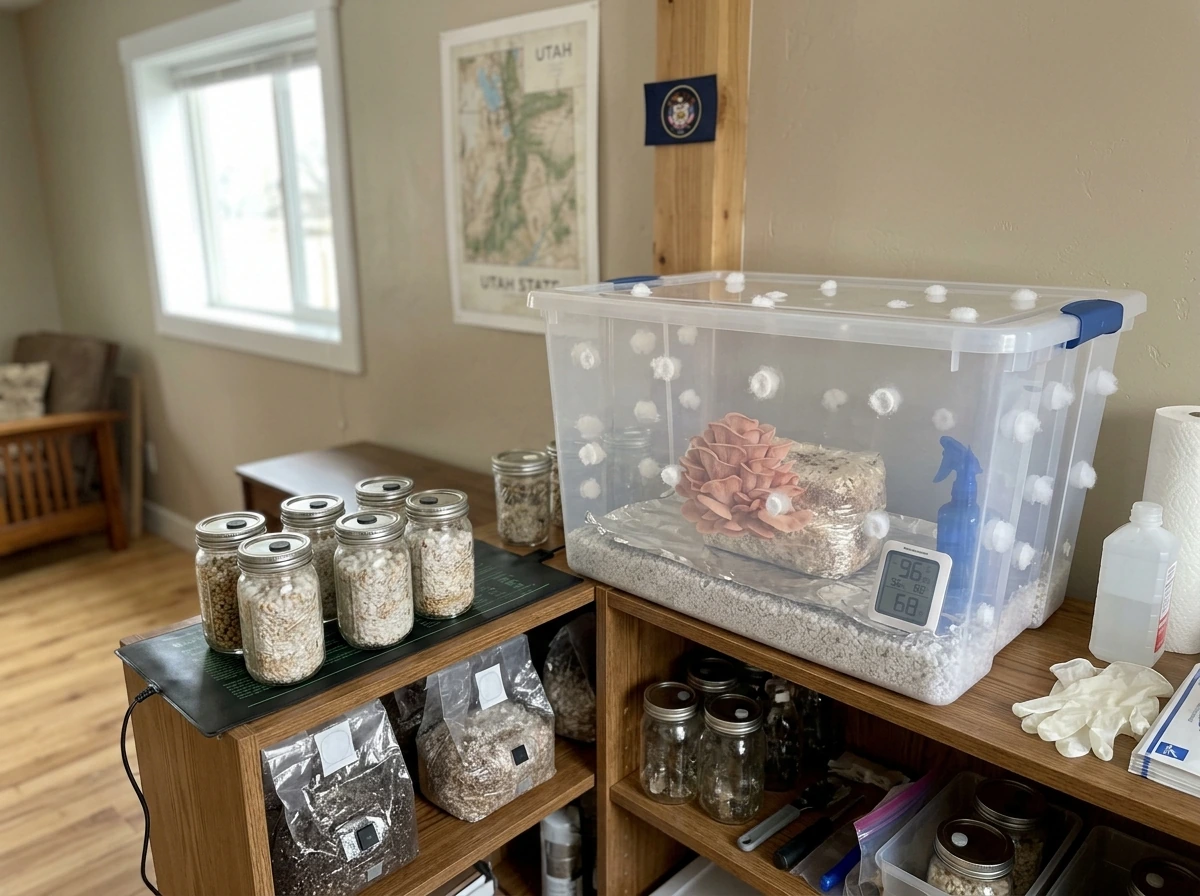
Once colonized, the block or substrate needs environmental triggers to produce mushrooms. For most species this means dropping temperature slightly (to roughly 65 to 72°F), increasing fresh air exchange, raising relative humidity to 85 to 95 percent, and introducing indirect light (a 12-hour cycle works well). A simple fruiting chamber can be as low-tech as a clear plastic tote with holes drilled in the sides and a layer of perlite on the bottom. Mist the walls (not the substrate directly) two to four times a day and fan briefly to exchange CO2. Pins should appear within 5 to 14 days of switching to fruiting conditions.
Cultivation requirements for psilocybe species (general biology)
Even setting aside the legal question, it helps to understand what psilocybe cultivation actually involves at a biological level, because it is more demanding than growing oyster mushrooms, and growers who underestimate that difficulty are the ones who fail repeatedly. Psilocybe cubensis, the species most commonly associated with home cultivation globally, colonizes grain or brown rice flour/vermiculite (BRF) substrates. It prefers colonization temperatures in the 75 to 80°F range and fruiting temperatures closer to 72 to 75°F with high humidity (90 to 95 percent relative humidity) and strong fresh air exchange.
Compared to oyster mushrooms, psilocybe species are slower colonizers and more sensitive to CO2 buildup. Inadequate fresh air exchange is one of the leading causes of aborts and stalled flushes. The substrate needs to stay hydrated between flushes (a process called rehydration soaking), and contamination pressure is significant because the colonization window is longer. In short, the environmental control skills you build growing legal species are directly applicable here.
Spores vs spawn: what the difference means for growers
This is a practical distinction that confuses a lot of beginners. Spores are the reproductive cells of the mushroom, analogous to seeds. Spawn is already-colonized material with active, growing mycelium. Each has a different role in the cultivation workflow.
| Factor | Spores | Spawn |
|---|
| Starting point | Germination required (spore to mycelium) | Mycelium already established |
| Skill level needed | Higher (sterile technique critical) | Lower (mycelium is more competitive) |
| Time to colonization | Longer (add 1 to 2 weeks for germination) | Faster (skips germination stage) |
| Legal note for psilocybe | Spores contain no psilocybin; legality varies by state | Colonized psilocybe spawn contains the substance; illegal in Utah |
| Best use case | Genetic research, microscopy, strain preservation | Inoculating bulk substrate for fruiting |
| Contamination risk | Higher during germination window | Lower if spawn is healthy and vigorous |
For legal edible species, buying ready-made grain spawn or plug spawn from a reputable supplier is the easiest and most reliable option for beginners. You skip the germination step and get faster colonization. For anyone working with spores (for microscopy or research purposes, the only currently legal application for psilocybe spores in most states), sterile technique during inoculation is non-negotiable. A single unsterilized tool or a contaminated agar surface will ruin the work.
On sourcing: buy spawn from established suppliers who test for contamination and label strains clearly. For edible species, many regional suppliers ship across the country. Avoid marketplace sellers who do not disclose the strain or production date. Fresh, actively growing spawn colonizes faster and resists contamination better than old or poorly stored material.
Setting up a small indoor grow from scratch
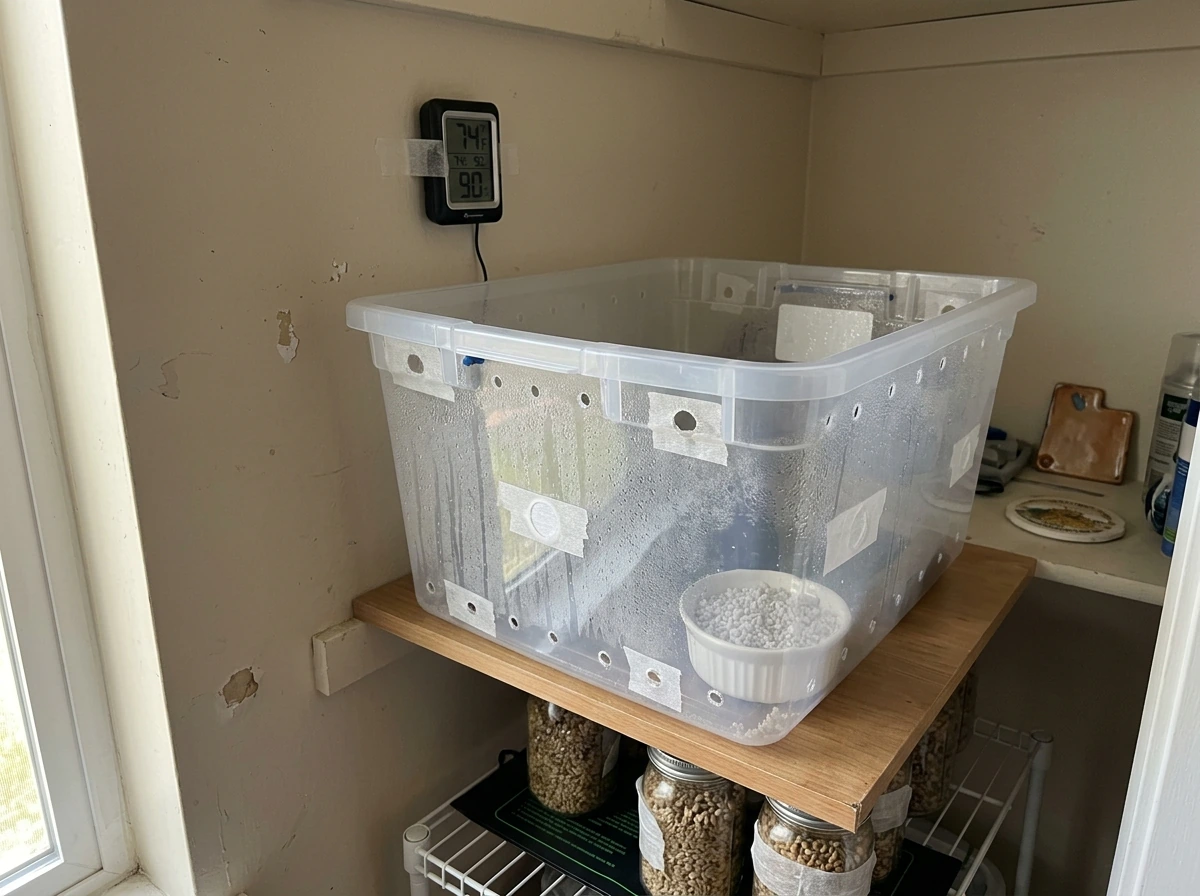
This setup is designed for a beginner in a small space, like a closet, spare bathroom, or garage corner. Everything here applies to legal edible species, and the same space and equipment would apply to any future legal cultivation.
Equipment list
- Clear plastic storage tote (50 to 66 quart) for a fruiting chamber
- 1/4-inch drill bit and drill for air exchange holes
- Perlite (several pounds) for humidity reservoir on chamber floor
- Spray bottle for misting
- Thermometer/hygrometer combo (digital, under $15)
- Pressure cooker (at minimum 6-quart, ideally 16-quart or larger) for sterilizing grain
- Mason jars (wide-mouth quart size) for grain spawn preparation
- Isopropyl alcohol (70 percent) and disposable gloves for sanitation
- Still-air box or flow hood for inoculation (a still-air box is DIY with a clear tote and two holes cut for your arms)
- Grow bags with filter patches (available from mushroom supply shops) for bulk substrate
- Substrate materials: hardwood pellets or sawdust, wheat bran, straw depending on species
Sanitation: the most important skill you will develop
Sanitation failures account for the majority of beginner losses. Before you touch any substrate, spawn, or equipment, wipe down your work surface with 70 percent isopropyl alcohol. Wear gloves. Work in the calmest air environment you can create. A still-air box cuts contamination risk dramatically compared to working on an open kitchen counter. Sterilize all grain spawn jars at 15 PSI for 90 minutes in your pressure cooker before inoculation. Pasteurize bulk substrates (straw especially) at 160 to 185°F for 1 to 2 hours rather than full sterilization, since some competing organisms in bulk substrate actually help resist pathogens.
Environment control: temperature and humidity targets
Incubation: 70 to 77°F, no light, minimal disturbance. If your space runs cold, a seedling heat mat under your jars or bags brings temperature up. Avoid placing anything directly on a heat mat without a buffer layer since hot spots can damage mycelium. Fruiting: 65 to 75°F, 85 to 95 percent relative humidity, fresh air exchange 4 to 6 times per day (fanning with the chamber lid open counts), and indirect light for 12 hours a day. Your digital hygrometer will tell you whether your misting schedule is keeping up. In dry Utah climates, especially in winter, you may need to mist more frequently than growers in humid states.
The basic workflow, step by step
- Prepare and sterilize your grain spawn jars (pressure cook at 15 PSI for 90 minutes, let cool 12 to 24 hours before inoculation)
- Inoculate grain jars with liquid culture or agar wedge using sterile technique inside your still-air box
- Incubate at 70 to 77°F until grain is fully colonized (10 to 21 days for most species)
- Prepare bulk substrate, pasteurize or sterilize as appropriate, and let it cool to room temperature
- Mix colonized grain spawn into bulk substrate at 20 to 30 percent by weight, pack into grow bag, and seal
- Incubate bulk block at 70 to 75°F until fully colonized (another 10 to 21 days)
- Transfer colonized block to fruiting chamber, adjust to fruiting conditions: drop temperature, raise humidity, increase FAE and light
- Harvest mushrooms when caps begin to open but before veils fully break (for most edible species), then rehydrate for additional flushes
Troubleshooting the most common problems
I have had grows go sideways in every way imaginable. Here is how to diagnose and fix the problems you are most likely to hit.
Green, black, or pink patches on substrate: contamination
Green is trichoderma. Black or dark gray is usually aspergillus or another mold. Pink or red tones can indicate bacterial contamination. If you see any of these, isolate that container immediately, do not open it inside your grow space. Bag it, take it outside, and discard it. Do not try to salvage a heavily contaminated jar or block. The cause is almost always one of three things: insufficient sterilization time or pressure, a break in sterile technique during inoculation, or an injection port or filter patch that was compromised. Review each step and identify where the failure happened before your next run.
Slow or stalled colonization
If mycelium is growing but very slowly, temperature is the first thing to check. Colonization below 65°F is noticeably sluggish. A seedling heat mat usually solves this. If growth has completely stopped and you do not see contamination, check moisture content: substrate that is too wet creates anaerobic pockets that stall mycelium. If you squeezed the substrate and water ran out freely, it was too wet. There is not much you can do to fix an over-wet block mid-colonization, but you can prevent it by testing moisture content before packing.
This is probably the most frustrating problem because it often happens after a successful colonization. The most common causes are insufficient fresh air exchange, too much CO2, and humidity that is too low. Check your FAE first: open the chamber, fan vigorously, and mist the walls. If you have been using a fully sealed chamber with no holes, that is the problem. Drill your holes or cut larger ports. Temperature being too high (above 78°F during fruiting) also inhibits pinning for many species. Some blocks also just need a cold shock: move them somewhere 10°F cooler than your grow space for 24 hours, then return to normal fruiting conditions.
Aborts (small pins that stop growing and die) usually mean humidity crashed during a critical growth window, or CO2 spiked. If you see a lot of aborts, increase your misting frequency and check that your FAE is consistent throughout the day, not just during scheduled misting. In Utah's dry climate, a passive perlite bed alone may not be enough humidity during winter when indoor heating is running. Consider adding a small ultrasonic humidifier on a timer set to maintain 88 to 92 percent RH inside the chamber.
Second and third flushes not appearing
After your first harvest, the block needs rehydration. Submerge it in cold water for 4 to 8 hours (cold tap water works fine), drain fully, and return it to fruiting conditions. Without this step, the block dries out internally and cannot support another flush. Most blocks will produce 2 to 4 flushes before yields drop significantly. After that, the spent substrate can be used as garden amendment or composted.
Legal edible and medicinal alternatives worth growing now
If you are in Utah today and want to put this knowledge to work immediately and legally, here are species that deliver real results with the same cultivation infrastructure and skill set.
| Species | Difficulty | Substrate | Time to First Harvest | Notes |
|---|
| Oyster mushrooms (Pleurotus ostreatus) | Beginner | Straw, cardboard, sawdust | 3 to 5 weeks total | Fastest, most forgiving, great for learning FAE and humidity management |
| Lion's mane (Hericium erinaceus) | Beginner-Intermediate | Hardwood sawdust block | 4 to 6 weeks total | Medicinal reputation, unique texture, slower than oysters but worth it |
| Shiitake (Lentinula edodes) | Intermediate | Supplemented hardwood block | 8 to 16 weeks total | Longer colonization, excellent yields over many flushes |
| Reishi (Ganoderma lucidum) | Intermediate | Hardwood sawdust or logs | 3 to 5 months | Grown for medicinal use; not eaten fresh but dried and used in teas |
| King oyster (Pleurotus eryngii) | Intermediate | Hardwood sawdust or cottonseed hull | 4 to 6 weeks total | Dense, meaty texture, longer shelf life after harvest |
Lion's mane in particular has attracted serious research interest for neurological health applications, and reishi has a long history in traditional medicine. Neither requires any special permits to cultivate in Utah, and both use the same pressure cooker, grain spawn, and fruiting chamber setup described above. Starting with oyster mushrooms is my honest recommendation for most beginners: they colonize fast, pin reliably, and teach you almost everything you need to know about humidity, FAE, and harvest timing before you move to slower or more demanding species.
Your next steps as a Utah grower
Here is the practical order of operations I would follow if I were starting from zero in Utah today. First, verify the current legal status one more time before acting: Utah Code § 58-37-4 and SB0114 are both worth reading directly, since state law can change between sessions. Second, decide on a legal species and order spawn from a reputable supplier. Third, build or buy a simple fruiting chamber and acquire the basic equipment listed above. Fourth, run at least one complete grow with an edible species before worrying about anything more complex: you will learn more from a single real grow than from weeks of research. Fifth, monitor legislative developments. If Utah's law changes in response to federal rescheduling (which SB0114 is explicitly designed to track), you will be in an excellent position to adapt your setup.
The fundamentals of indoor mushroom cultivation are genuinely learnable, the equipment is affordable, and the failure points are all fixable once you understand what causes them. Build the skill set now with species you can legally grow, and you will be a competent, practiced grower whenever the legal landscape evolves.