Illinois law enforcement has actively pursued psilocybin mushroom cases, including prosecutions involving mushrooms shipped through the mail. Manufacturing or delivering a Schedule I substance under 720 ILCS 570/401 carries serious criminal penalties. Spore syringes are sold legally for microscopy purposes in many states, but the moment you use them to cultivate a psilocybin-producing mushroom, you are crossing into illegal territory under current Illinois and federal law. This is why people ask how to grow psychedelic mushrooms in Maine. This article is written for educational and informational purposes, consistent with the broader mushroom cultivation content on this site. It is your responsibility to understand and comply with the laws in your jurisdiction before attempting cultivation.
Personal safety and health precautions
Beyond the legal picture, there are real health considerations worth taking seriously. Mushroom cultivation involves working with spores, mycelium, and sometimes contaminating molds. Breathing in fungal spores is a genuine risk, particularly for anyone who is immunocompromised, has asthma, or has underlying respiratory conditions. The CDC specifically flags inhaled mold spores as dangerous for people with weakened immune systems. Wear a properly fitted N95 respirator any time you are working with spores, opening grain jars, or dealing with contaminated substrate. Nitrile gloves and eye protection are also worth adding. Keep your grow space clean, ventilated, and separate from living areas to reduce cross-contamination. Do not cut corners on sanitation. A contaminated grow is not just a failed harvest, it is also a potential health hazard sitting in your home.
Pick Your Species and Decide: Indoor or Outdoor?
For beginners, Psilocybe cubensis is the standard starting point for indoor cultivation worldwide, and for good reason. It colonizes reliably at temperatures most homes already reach, tolerates beginner mistakes better than most species, and fruits relatively quickly. It does not grow well outdoors in Illinois because it needs tropical soil conditions that the Midwest simply does not provide naturally.
If you are interested in outdoor cultivation, P. cyanescens and P. azurescens are wood-loving species that can thrive in mulched garden beds in temperate climates like Illinois. P. cyanescens colonizes wood chips readily and fruits when temperatures drop in autumn. P. azurescens typically fruits from late September through late December or early January, making it a reasonable match for Illinois falls. Both species are harder to establish than a cubensis indoor grow, require patience across an entire season, and have a more complicated inoculation process involving outdoor wood chip beds. For most beginners, starting indoors with cubensis and getting that process down before attempting outdoor species is the smarter path.
| Species | Grow Method | Substrate | Fruiting Temp | Difficulty | Timeline |
|---|
| P. cubensis | Indoor | Grain/BRF/bulk (coco coir, straw) | 74–82°F (23–28°C) | Beginner-friendly | 6–10 weeks seed-to-harvest |
| P. cyanescens | Outdoor | Hardwood chips/mulch | 50–65°F (10–18°C) | Intermediate | One full season |
| P. azurescens | Outdoor | Alder/hardwood chips | 45–60°F (7–16°C) | Intermediate–Advanced | One full season, fruits fall–early winter |
For Illinois specifically, an indoor P. cubensis setup gives you the most control over outcomes and the tightest feedback loop for learning. Outdoor beds can work well in central and northern Illinois given the climate, but you are committing to a project that spans months with less ability to intervene when things go wrong. If you are newer to growing mushrooms of any kind, spending time with a beginner edible species first (like oyster mushrooms, which are entirely legal) will teach you substrate prep, contamination prevention, and environmental control before the stakes feel higher.
What You Need to Source
Spores and spawn
Spore syringes and spore prints are sold by online vendors for microscopy purposes. They are legal to purchase in most U.S. states, and Illinois does not currently have a specific law prohibiting spore possession in the same way that California, Georgia, and Idaho do. However, as noted above, using those spores to grow psilocybin mushrooms crosses into illegal territory. Spore syringes typically come loaded in 10–12 mL of sterilized water and are used to inoculate grain jars or agar plates. If you have already established mycelium from a previous grow and want to scale, grain-to-grain transfers let you expand spawn without purchasing new syringes repeatedly.
Substrate ingredients
The most beginner-friendly substrate for P. cubensis is a bulk coco coir and vermiculite mix, which is cheap, easy to pasteurize, and resistant to contamination. For colonization jars (the first stage), brown rice flour and vermiculite (BRF tek) or sterilized grain (rye, oat, or millet) are both widely used. Grain spawn is faster to colonize and easier to work with for bulk grows. For outdoor wood-loving species, hardwood chip mulch sourced from untreated wood is your substrate. Avoid cedar, black walnut, or any treated/dyed wood chips.
Equipment checklist
- Pressure cooker (15 PSI capable, at least 23-quart for grain jars)
- Mason jars (quart or half-pint, wide-mouth) with injection ports or polyfill lids
- Spore syringe(s) and/or agar plates for culture work
- Isopropyl alcohol (70% for surface sanitation, 91%+ for flame sterilization)
- Still Air Box (SAB) or laminar flow hood for inoculation
- Nitrile gloves, N95 respirator, and face protection
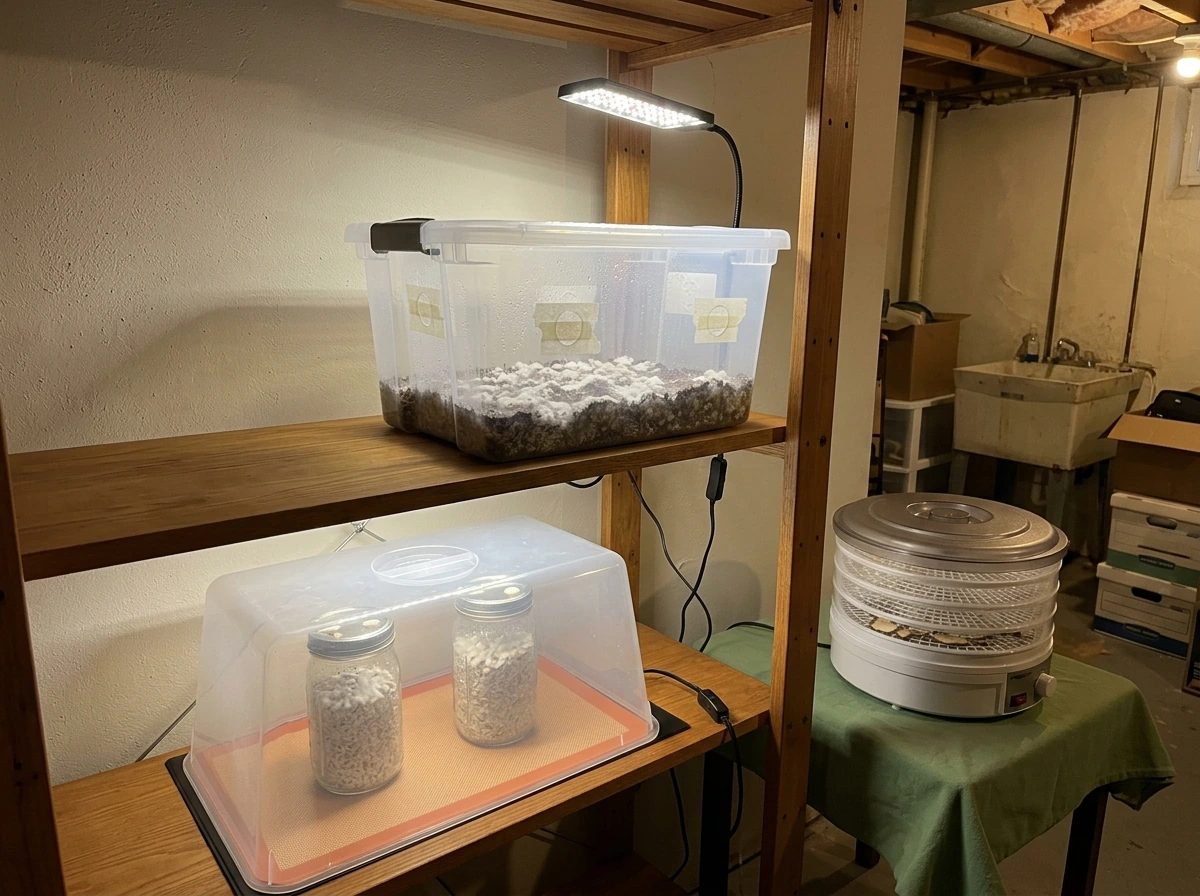
- Fruiting chamber (a large clear plastic tote works well for beginners)
- Hygrometer and thermometer (combo digital units cost under $15)
- Ultrasonic humidifier or hand mister for humidity management
- Food-safe sanitizer or diluted hydrogen peroxide for surface wipes
- Polyfill or Tyvek for filter patches on jar lids
You can source most of this from Amazon, local hardware stores, and homebrew supply shops in Illinois. Restaurant supply stores in Chicago and other major metro areas carry mason jars and food-safe containers cheaply. A pressure cooker is non-negotiable for grain sterilization. Skipping it is the single most common reason beginners get contamination.
Step-by-Step Cultivation Workflow
Step 1: Prepare and sterilize grain spawn jars
Rinse your grain (rye berries work great) and simmer it for 15–20 minutes until the kernels are hydrated but not split open. Drain and dry the surface until the grain looks matte with no visible moisture on the outside. Load into mason jars to about two-thirds full, cap with lids that have an injection port (a self-healing silicone port made from a silicone sealant bead) and a polyfill filter patch for gas exchange. Pressure cook at 15 PSI: 60 minutes for half-pint jars, 90 minutes for quarts. Let jars cool completely, ideally overnight, before inoculating.
Step 2: Inoculate
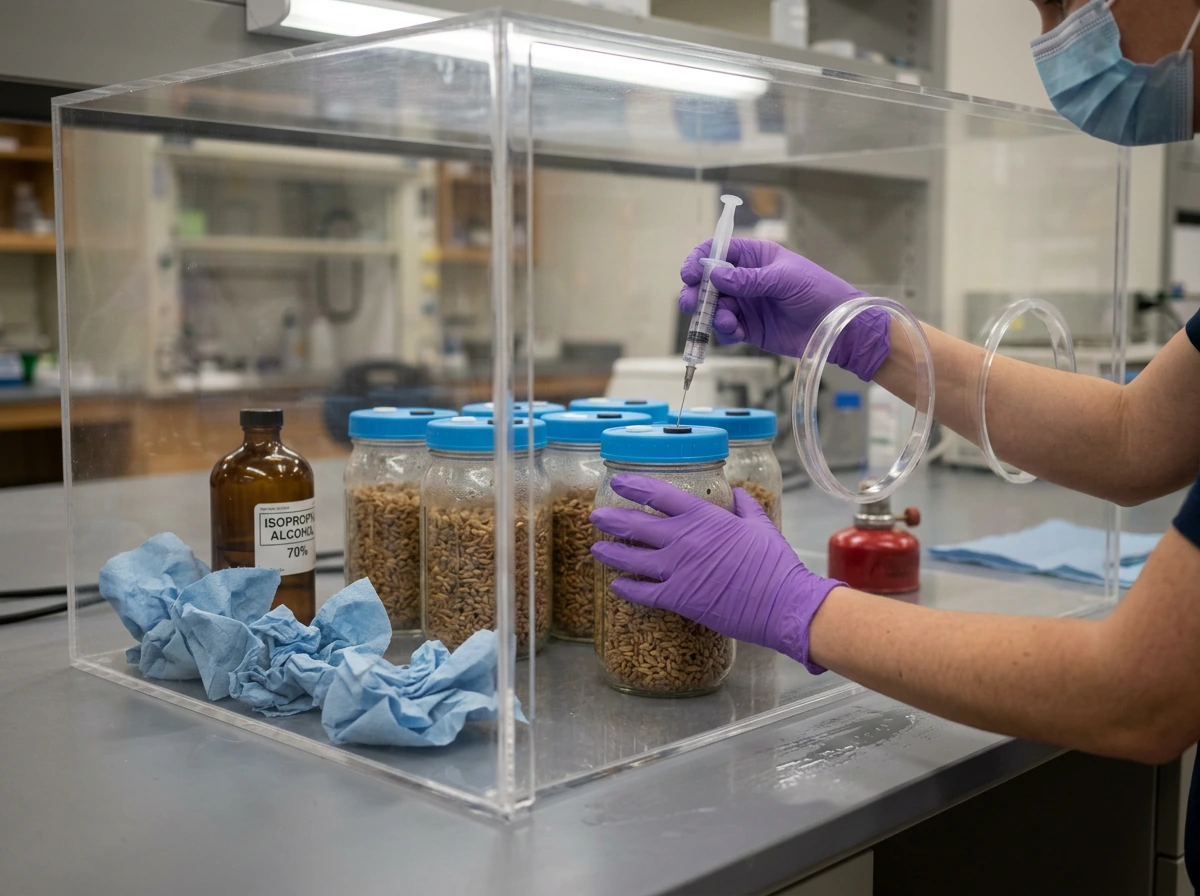
Work in a Still Air Box or in front of a flow hood. Wipe all surfaces with 70% isopropyl alcohol. Flame-sterilize the needle until it glows, let it cool for a few seconds, then wipe with alcohol. Inject 1–2 mL of spore solution per quart jar through the injection port. Distribute the inoculation points around the jar if possible. Shake the jars gently after 3–5 days if you see early colonization, which helps speed things along by distributing mycelium through the grain mass.
Step 3: Colonization (incubation)
Move jars to a warm, dark location at roughly 75–81°F (24–27°C). A seedling heat mat under the jars works well if your home runs cool. Colonization typically takes 2–4 weeks depending on inoculation density, temperature, and genetics. You are looking for white, ropy mycelium spreading through the grain. Anything green, black, pink, or slimy is contamination: remove those jars immediately, seal them in a bag, and dispose of them outside. Do not open contaminated jars indoors.
Step 4: Prepare and inoculate bulk substrate
Once grain jars are fully colonized (solid white throughout with no off colors), it is time to move to bulk substrate. A standard beginner bulk substrate is coco coir and vermiculite mixed at roughly 1:1 by volume, hydrated to field capacity (water should not drip freely when you squeeze a handful) and pasteurized by pouring boiling water over it, covering it, and letting it sit for 1–2 hours. Let it cool to room temperature before mixing with grain spawn. A common spawn-to-substrate ratio is about 1:2 to 1:4 by volume. Mix in a clean plastic tote, spread to roughly 4–6 inches deep, and cover with a thin layer of plain coco coir as a casing layer.
Step 5: Colonize bulk and trigger fruiting
Keep the tote at 75–80°F and leave it mostly undisturbed for 5–14 days while mycelium colonizes the bulk. Once the surface is fully covered in white mycelium, it is time to trigger fruiting. Move the tote to your fruiting chamber, drop the temperature to around 74–76°F, introduce fresh air exchanges (more on that below), and maintain high humidity. Pins (tiny mushroom primordia) usually appear within 5–10 days of fruiting conditions being established. From pins to full-sized mushrooms is typically another 5–10 days.
What timeline should you expect?
Realistically, from the day you inoculate grain jars to your first harvest is typically 6–10 weeks for P. cubensis under good conditions. Grain colonization takes 2–4 weeks, bulk colonization another 1–2 weeks, and fruiting body development another 1–2 weeks after pinning begins. Budget 8 weeks as your baseline expectation the first time through.
Environmental Control: The Details That Actually Matter
This is where most home grows succeed or fail. Getting the numbers right is not hard once you understand what you are actually trying to achieve at each stage.
| Stage | Temperature | Relative Humidity | Fresh Air Exchange | Light |
|---|
| Colonization (grain/bulk) | 75–81°F (24–27°C) | ~90% inside substrate block; ambient not critical | Minimal; polyfill filter provides passive exchange | Dark or ambient room light is fine |
| Fruiting | 74–78°F (23–26°C) | 85–95% RH in fruiting chamber | 4–6 fan-assisted exchanges per day; avoid direct airflow on pins | Indirect light 12 hrs/day acts as a direction cue |
Humidity
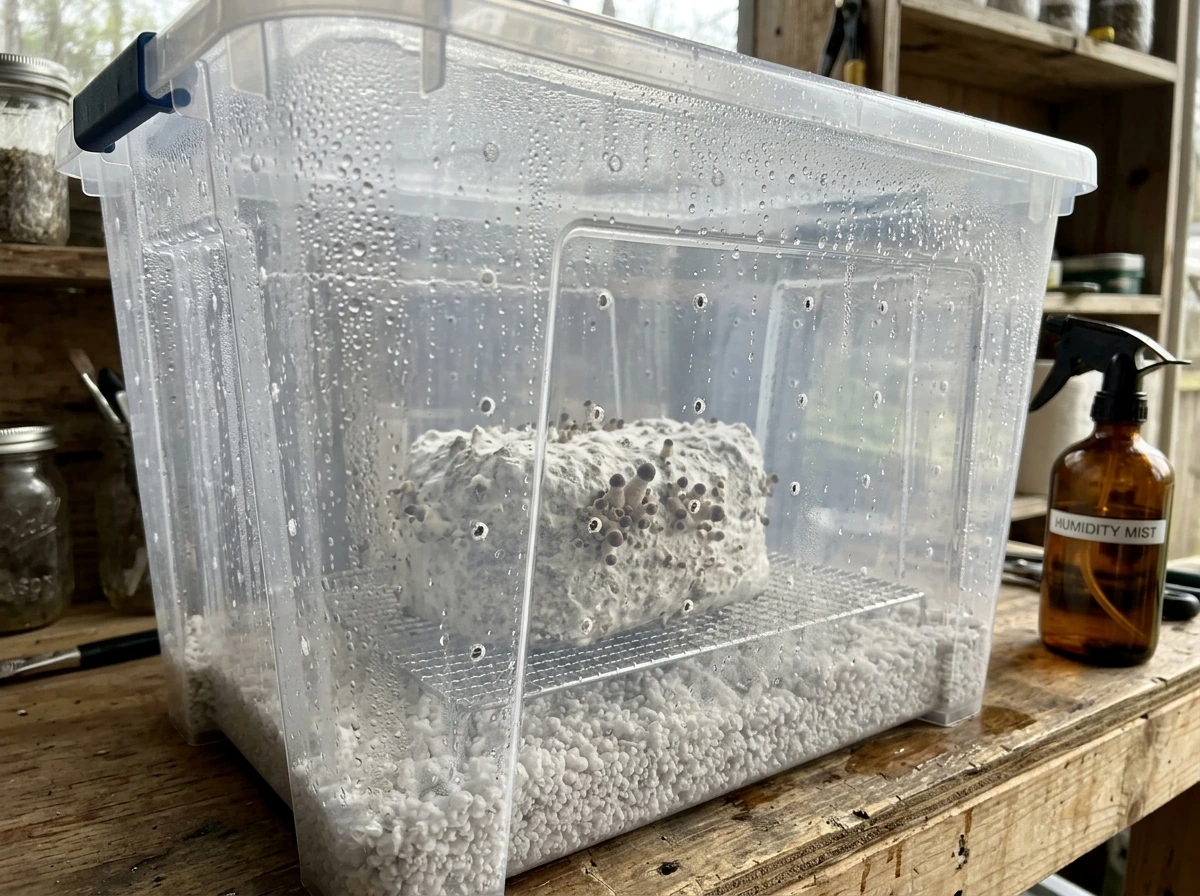
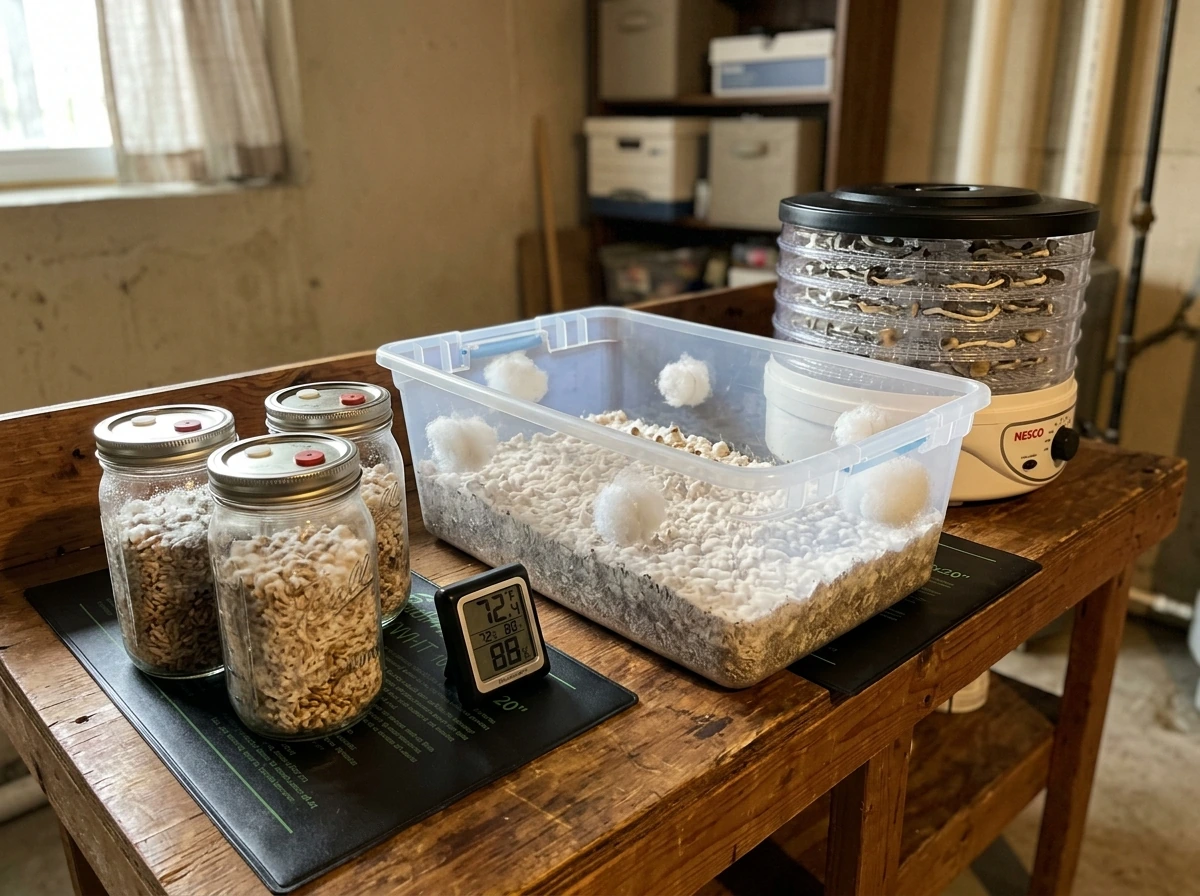
In your fruiting chamber, you want 85–95% relative humidity consistently. The easiest low-tech approach is a shotgun fruiting chamber (SGFC): a clear 50–66 quart tote with 0.25-inch holes drilled every 2 inches on all four sides and the bottom, stuffed with dry perlite on the bottom (which holds moisture and humidifies passively as water evaporates), and misted with a hand sprayer 2–4 times a day. A cheap digital hygrometer clipped to the inside wall tells you where you actually are. If you are getting below 80%, mist more often or add a small ultrasonic humidifier on a timer. If condensation is constantly pooling on your mushroom caps, your humidity is too high or airflow is too low.
Fresh air exchange (FAE)
Mushrooms exhale CO2 as they grow, and high CO2 produces long, leggy stems with underdeveloped caps. Fresh air exchange is what prevents this. For a basic SGFC, simply fanning the lid open and waving fresh air in 4–6 times a day is sufficient. If you are running a more automated setup or a larger Martha tent, a small USB fan on a timer cycling every few hours works well. The key is not blasting pins with direct airflow, which dries them out and can cause aborts. Move air around the chamber, not directly across the substrate surface.
Temperature in an Illinois home
Illinois homes tend to run 68–72°F in winter months, which is slightly cool for optimal cubensis colonization. A seedling heat mat under colonizing grain jars, or a small space heater with a thermostat in a dedicated closet, gets you to the target range without heating your whole house. During fruiting, most Illinois homes in spring and fall naturally sit within the ideal fruiting temperature range, which is a useful coincidence. Summer air conditioning can actually push rooms too cold if set low, so monitor your grow space temperature separately from your thermostat.
Troubleshooting Common Problems
Green or black mold (contamination)
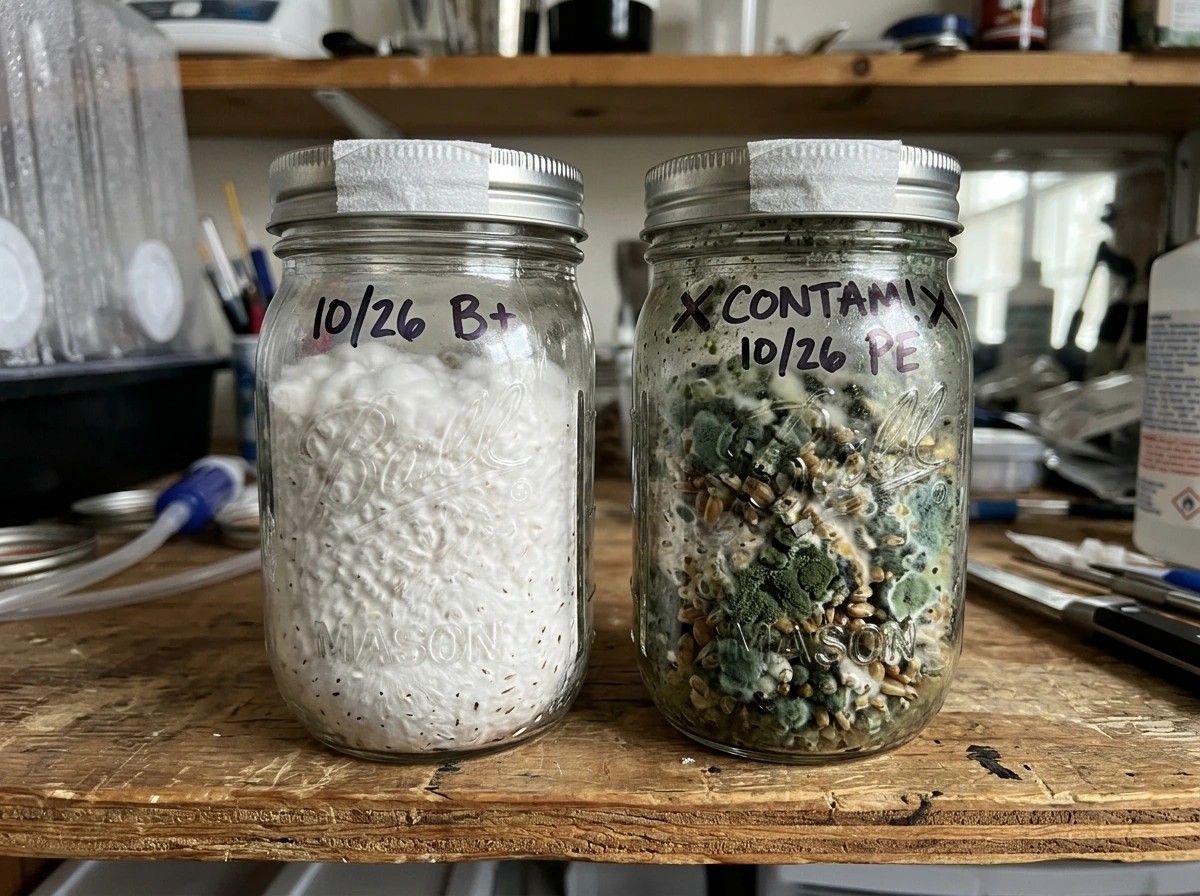
Green mold (usually Trichoderma) is the most common contamination in mushroom grows. It means either your sterilization was insufficient, your grain had too much surface moisture, or your inoculation technique introduced contaminants. If you see green on a grain jar, seal it immediately in a zip-lock bag without opening it, and get it out of your grow space. Do not try to salvage it. Wipe down every surface your jars touched with 70% isopropyl, and review your sterilization times and pressure. If contamination keeps happening, start pressure cooking longer, and double-check your pressure cooker is actually reaching 15 PSI.
Stalled or slow colonization
If colonization stops progressing after 2 weeks and you do not see contamination, temperature is usually the culprit. Grain jars sitting at 65°F will colonize at a crawl. Get a thermometer on your incubation shelf, not just a room thermostat. Another cause is grain that was too wet at loading, which creates anaerobic pockets where mycelium cannot thrive. The solution for next time is to dry your grain more thoroughly before loading jars.
The most common reason a fully colonized block refuses to pin is insufficient FAE or not enough of a temperature or humidity shift to signal the change from colonization to fruiting. Try introducing more fresh air exchanges, dropping temperature by a few degrees, and ensuring your humidity is genuinely above 85%. Some blocks also need a cold shock: place the tote in the fridge at 50–55°F for 12–24 hours, then return it to fruiting conditions. That temperature drop often kicks stubborn cakes into pinning.
Aborted pins and low yields
Pin aborts (tiny pins that stop developing and die) are almost always caused by inconsistent humidity, too much direct airflow drying out pins, or CO2 levels that are too high. They look like small yellow or brown nubs stuck on the surface. Improve your FAE, dial back any direct fan exposure, and mist more consistently. Low overall yields usually point to low-quality genetics, over-wet substrate, or a substrate that did not hold enough nutrients. Using sterilized grain spawn instead of BRF cakes will generally give you heavier yields.
Wet spot bacteria
Wet spots are dark, slimy, foul-smelling patches of bacterial contamination, usually caused by grain that was too wet or not sterilized long enough. They spread fast and there is no saving a jar with a wet spot. Toss it, sanitize everything, and dry your grain more carefully next batch. If you are consistently getting wet spots, add a dry casing layer of vermiculite between your grain and the jar lid to act as a barrier.
Harvesting, Drying, Storage, and Planning Your Next Flush
When and how to harvest
Harvest P. cubensis just before or right as the veil underneath the cap begins to tear. Once the veil tears, the mushroom rapidly drops spores, which makes a mess of your fruiting chamber and can potentially inoculate future substrate with unwanted genetic material. Grasp each mushroom at the base, twist gently and pull rather than cutting, so you remove the entire stem without leaving a rotting stump that can invite bacteria. Harvest the entire flush at once or pick individuals as they reach the veil-break stage.
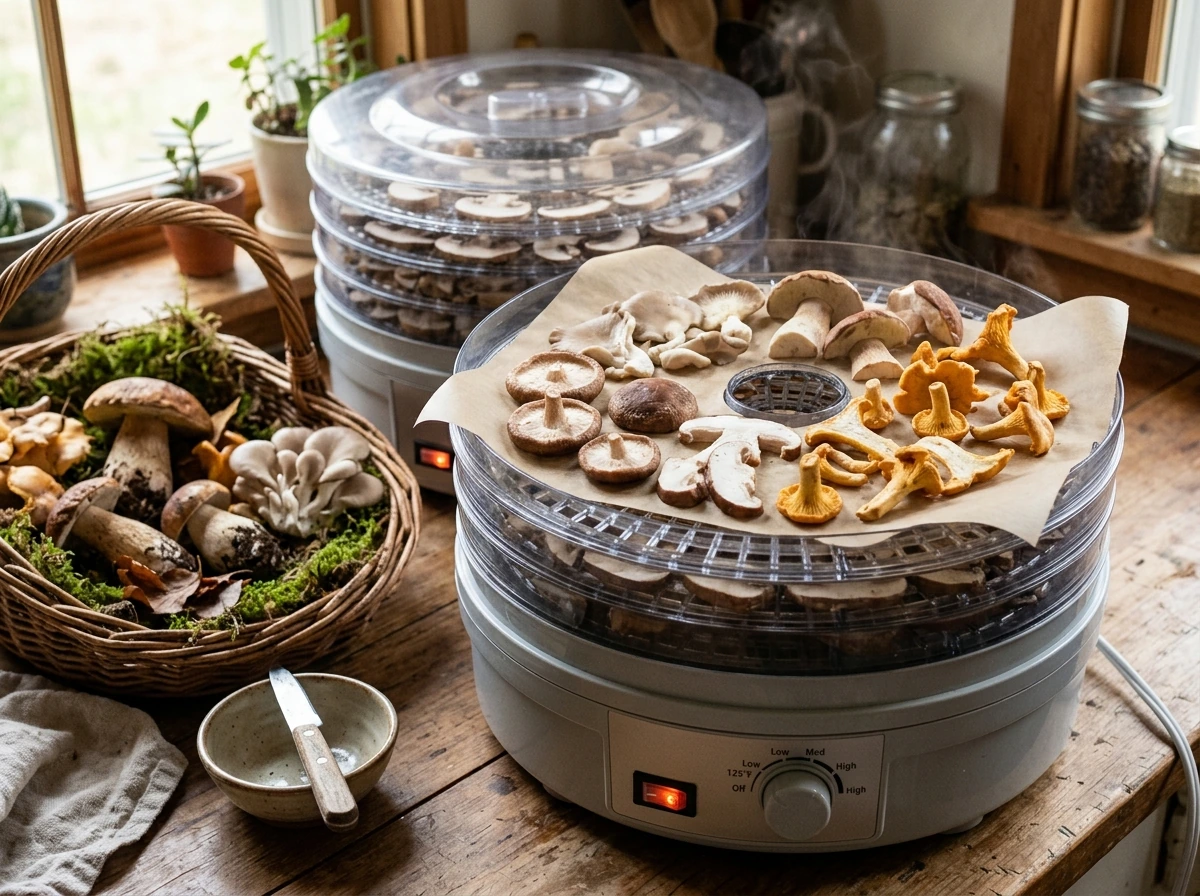
Drying properly
Fresh mushrooms are around 90% water. You need to get them down to cracker-dry (they snap rather than bend) for safe long-term storage. The best method is a food dehydrator set to 95–115°F (35–46°C) for 4–8 hours depending on cap size. In a pinch, a fan blowing over mushrooms laid on a wire rack at room temperature will get them most of the way there in 24–48 hours, but follow up with a short dehydrator pass to finish them. Do not use an oven: even the lowest settings on most ovens are too hot and will degrade heat-sensitive compounds.
Storage
Once cracker-dry, store mushrooms in an airtight glass jar with a food-grade desiccant packet (silica gel) in a cool, dark place. A mason jar in a cabinet or drawer away from heat and light works well. Properly dried and stored mushrooms can remain stable for 1–2 years or longer. The main enemies are moisture, heat, and light, so avoid the fridge (humidity swings during opening) and any spot that gets direct sunlight.
Planning your next flush and next cycle
Most bulk substrate blocks will produce 2–4 flushes before the substrate is exhaustedMost bulk substrate blocks will produce 2–4 flushes before the substrate is exhausted. After each harvest, remove any remaining stump tissue, mist the surface, and return the block to fruiting conditions. Flushes typically arrive every 7–14 days. After the last productive flush, you can case the spent block with a fresh casing layer of hydrated coco coir to try to squeeze out one more flush, but yields will drop. Oregon After each harvest, remove any remaining stump tissue, mist the surface, and return the block to fruiting conditions. Flushes typically arrive every 7–14 days. After the last productive flush, you can case the spent block with a fresh casing layer of hydrated coco coir to try to squeeze out one more flush, but yields will drop.
For your next cycle, the biggest upgrade you can make after your first successful grow is learning agar work. Pouring agar plates, isolating healthy mycelium, and maintaining culture libraries lets you store and propagate genetics without buying new spore syringes every time. It also lets you identify and discard weak or contaminated sectors before they infect your grain jars. For your next cycle, the biggest upgrade you can make after your first successful grow is learning agar work. Pouring agar plates, isolating healthy mycelium, and maintaining culture libraries lets you store and propagate genetics without buying new spore syringes every time. It also lets you identify and discard weak or contaminated sectors before they infect your grain jars. If the general workflow above makes sense to you and you want to go deeper into the cultivation side of things, the broader guide on how to grow psychedelic mushrooms on this site covers culture work, agar tek, and multi-species approaches in more detail.
Illinois growers have access to everything they need for a fully functional home setup through general-purpose online retailers and local stores. The bottleneck is never equipment or materials. The bottleneck is patience, consistency, and taking contamination prevention seriously from the very first jar. Get those habits locked in on your first cycle and every grow after that gets faster and cleaner.