Growing psychedelic mushrooms in Maine is legal to research and prepare for in specific ways, but the cultivation and possession of psilocybin-containing mushrooms remains illegal under both federal law and Maine state law as of March 2026. That's the reality you need to sit with before reading anything else here. This article is written as a practical cultivation guide for educational purposes, covering the full growing workflow so you understand what the process actually involves. Before you source anything, grow anything, or handle anything, verify current Maine state law and federal law yourself, ideally with a legal professional. Laws around psilocybin are changing fast across the U.S., and what's true today may shift. With that clearly stated, let's get into the practical side of what growing psychedelic mushrooms in Maine actually looks like.
How to Grow Psychedelic Mushrooms in Maine: Step-by-Step
Maine's climate basics for mushroom growing
Maine is a genuinely challenging state for outdoor cultivation of almost anything, and mushrooms are no exception. The state spans USDA hardiness zones 3b in the far northern interior all the way up to zone 6a along the southern coast. Portland and Rockland sit in a more forgiving zone 5b to 6a range, while Bangor and points north face harder winters and shorter windows. Portland's average last spring frost falls around May 1, with the first fall frost coming back around October 9. Bangor is tighter, last frost around May 9, first frost back by September 30, giving you roughly 143 frost-free days at best. Statewide, you're looking at an average growing season of about 155 days.
For mushroom cultivation specifically, what matters most isn't just frost dates. It's the combination of ambient temperature, relative humidity, and how quickly conditions swing. Maine summers are relatively cool and humid, which is actually a plus for many mushroom species, but the shoulder seasons (spring and fall) are unpredictable and cold snaps can wipe out outdoor fruiting bodies overnight. Indoor growing gives you control over all of this, which is why most serious growers in cold-climate states like Maine do the bulk of their work indoors and treat outdoor growing as a secondary or supplemental method.
Choose your species and decide: indoor vs outdoor in cold weather
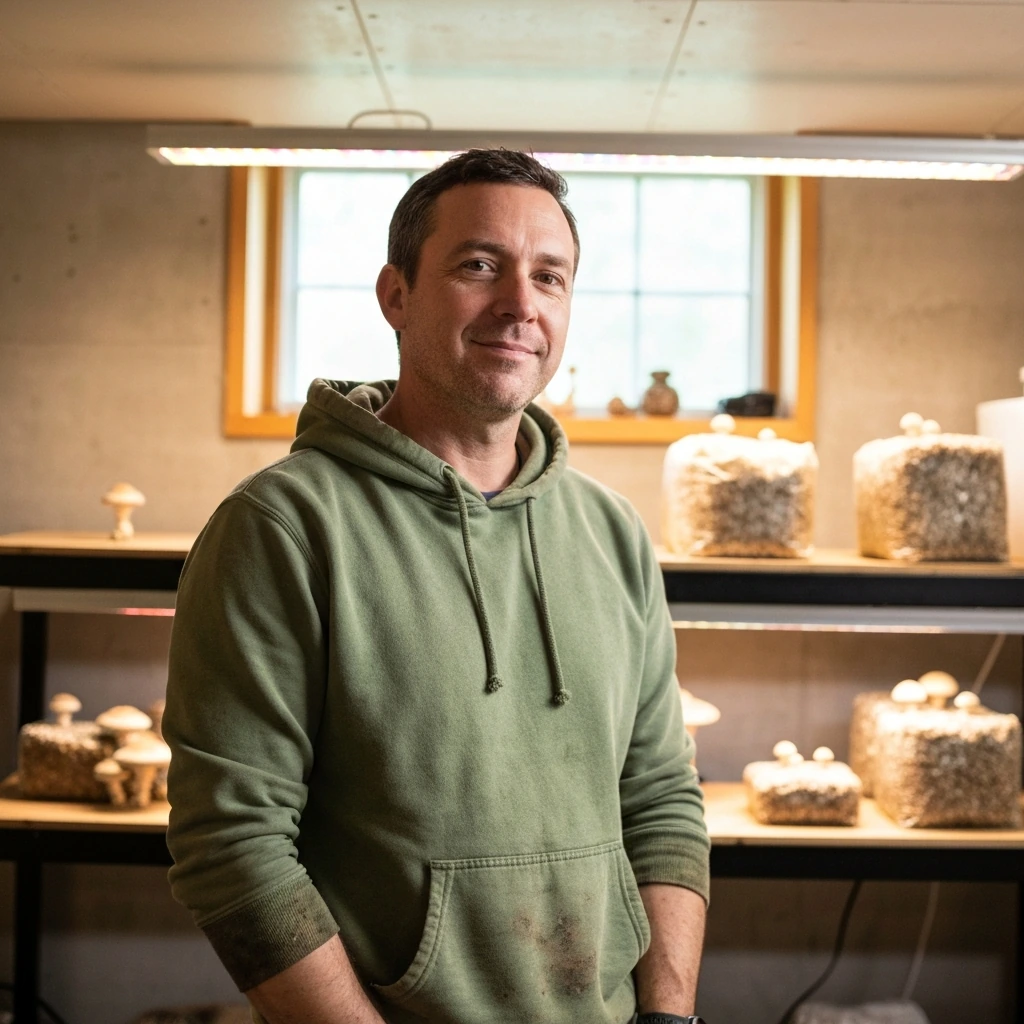
Psilocybe cubensis is the most commonly cultivated psychedelic mushroom species in home grow setups worldwide, and for good reason. It's forgiving, well-documented, colonizes relatively quickly, and has been bred into dozens of stable varieties with different pinning behaviors and yields. For someone in Maine working indoors, cubensis is the logical starting point. Other species like Psilocybe cyanescens or Psilocybe azurescens are cold-tolerant wood-lovers that can fruit outdoors in cool temperatures, but they're significantly harder to cultivate and require a different substrate and setup entirely.
The indoor vs outdoor decision in Maine basically comes down to this: if you want a controlled, repeatable process that isn't at the mercy of a late May frost or an early October cold snap, grow indoors. If you're interested in wood-chip outdoor beds with cold-hardy species, understand that you're looking at a longer colonization timeline (often 6 to 12 months for mycelium to establish in an outdoor bed), a narrower fruiting window, and far less control over contamination. For a beginner, start indoors with cubensis. For an experienced grower looking to expand outdoors, cold-tolerant wood species are worth exploring once you have the indoor workflow dialed in.
| Factor | Indoor (P. cubensis) | Outdoor (cold-tolerant wood species) |
|---|---|---|
| Difficulty | Beginner-friendly | Intermediate to advanced |
| Season dependence | Year-round | Limited to cool spring/fall window |
| Colonization time | 2 to 4 weeks | 6 to 12 months |
| Substrate | Grain spawn + bulk substrate (coco coir, straw, etc.) | Hardwood chips or logs |
| Contamination risk | Moderate (controlled with sterile technique) | High (open environment) |
| Yield predictability | High | Low to moderate |
| Best Maine region | Anywhere indoors | Southern coast (longer season) |
My honest recommendation for Maine growers: start indoors, get at least two or three successful indoor grows under your belt, then consider an outdoor bed experiment if you're curious. The cold climate makes outdoor cultivation harder here than in most of the continental U.S., and the learning curve for outdoor wood-loving species is steep enough that stacking it with the general learning curve of mushroom cultivation is a recipe for frustration.
Materials, sourcing, and what to verify legally before you buy anything
Here's where the legal picture gets more nuanced. Psilocybin spores, the reproductive cells of psychedelic mushroom species, do not contain psilocybin themselves. Because of this, spores exist in a legal gray zone in many U.S. states. They're legal to purchase and possess for microscopy purposes in most states, including Maine (as of this writing), but germinating those spores to grow mushrooms crosses into illegal territory under federal law and Maine state law. This distinction matters. Know it, verify it for your current situation, and make decisions accordingly. The rest of this guide covers cultivation workflow for educational purposes.
For an indoor grow, here's what you'll need in terms of materials:
- Spores or liquid culture (sourced from a reputable vendor for microscopy; verify current legality in Maine before purchasing)
- Grain jars or grain bags for making spawn (rye grain, wheat berries, or popcorn all work; rye is a classic choice)
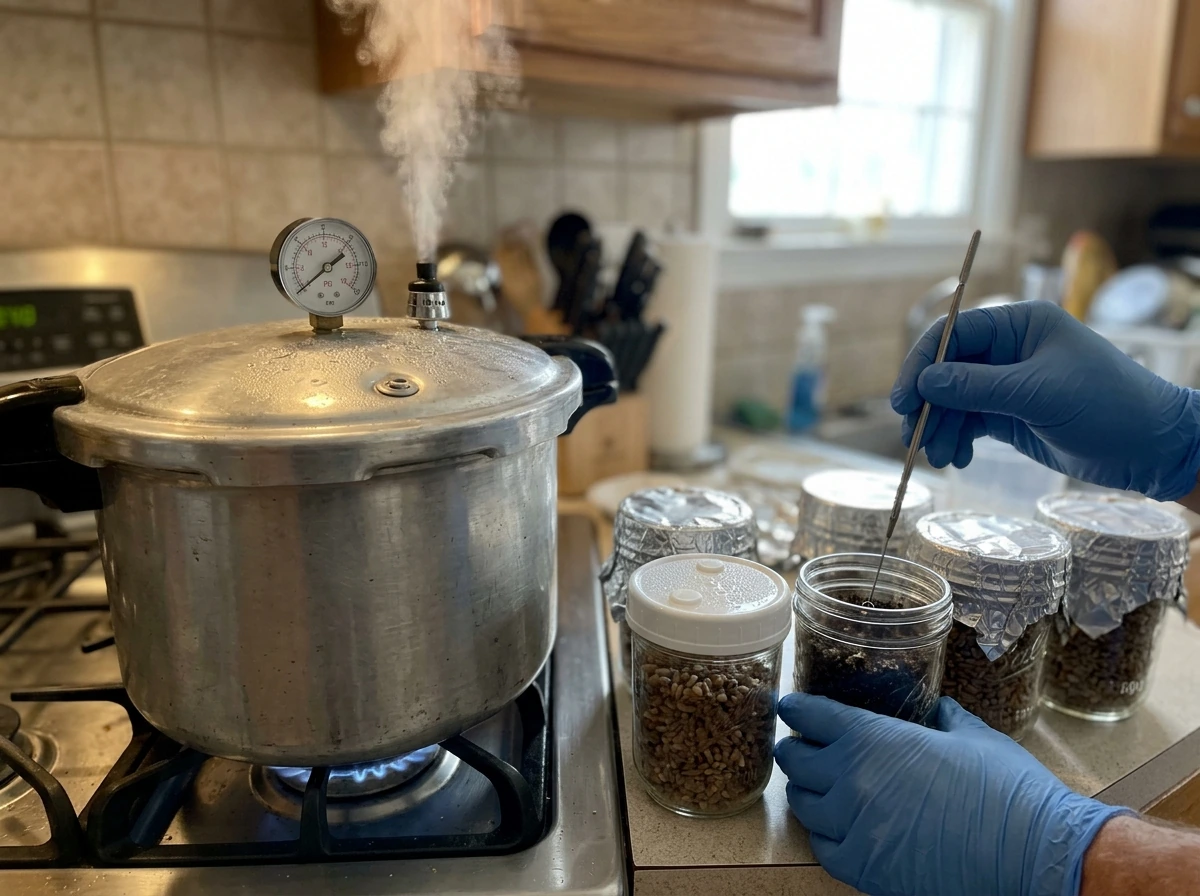
- Pressure cooker for sterilization (a 23-quart All American or similar; this is non-negotiable for grain sterilization)
- Bulk substrate materials: coco coir, vermiculite, and optionally pasteurized manure or straw
- Monotub or shotgun fruiting chamber (SGFC) for fruiting
- Polyfill or tyvek for filter patches on jars/bags
- Isopropyl alcohol (70% is more effective than 91% for surface sterilization), gloves, and a still air box or flow hood
- Hygrometer and thermometer for monitoring fruiting conditions
- Spray bottle for maintaining humidity
When sourcing materials in Maine, you can get most of this through Amazon or local garden centers. Pressure cookers show up at Goodwill and yard sales regularly, which helps with the startup cost. For substrate materials, coco coir is widely available at garden centers and pet stores (it's sold as reptile bedding). Grain for spawn is easiest to source in bulk from health food stores or online. The biggest cost in a home setup is usually the pressure cooker, so don't skip it or try to substitute it with a regular pot. Under-sterilized grain is the number one cause of contamination in beginner grows.
Preparing your substrate and inoculating your jars
The basic indoor workflow for cubensis starts with making grain spawn, then using that spawn to inoculate a bulk substrate. Here's how it goes step by step.
Preparing grain spawn
- Rinse your grain (rye, wheat berries, or popcorn) and simmer it in water for 15 to 20 minutes until the kernels are hydrated but not split open or mushy.
- Drain and let the grain dry on a towel for 30 to 60 minutes until the surface is visibly dry but the interior is still moist. This surface dryness is critical to prevent bacterial contamination.
- Load grain into mason jars (half-pint or quart) to about two-thirds full. Add a polyfill filter patch under the lid.
- Pressure cook at 15 PSI for 90 minutes (for pint jars) to 2.5 hours (for quart jars). Let cool completely to room temperature before inoculating, ideally overnight.
- In a still air box or in front of a flow hood, use a sterile syringe to inject your spore solution or liquid culture through an injection port or self-healing silicone port. Use about 1 to 2 cc per half-pint jar.
- Seal, label with the date, and move to your incubation space.
Preparing bulk substrate
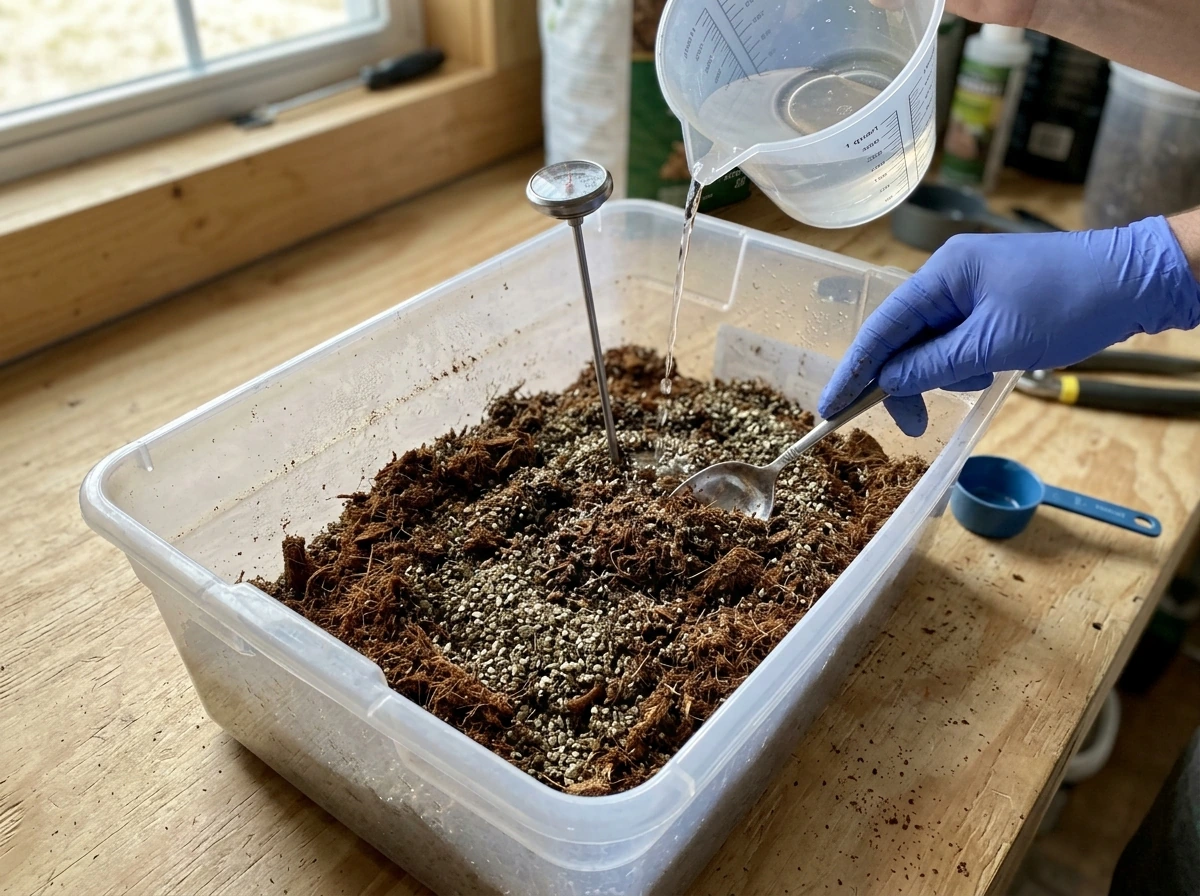
The most beginner-friendly bulk substrate for cubensis is a 50/50 mix of coco coir and vermiculite, often called CVG (coco coir, vermiculite, and a small amount of water). Mix one block of coco coir (usually 650g) with an equal volume of coarse vermiculite and enough boiling water to bring the mixture to field capacity. Field capacity means the substrate holds moisture but water doesn't drip out when you squeeze a handful. This substrate only needs pasteurization, not full sterilization, because its low nutrient content doesn't support most bacterial competitors. Let it cool to room temperature before use.
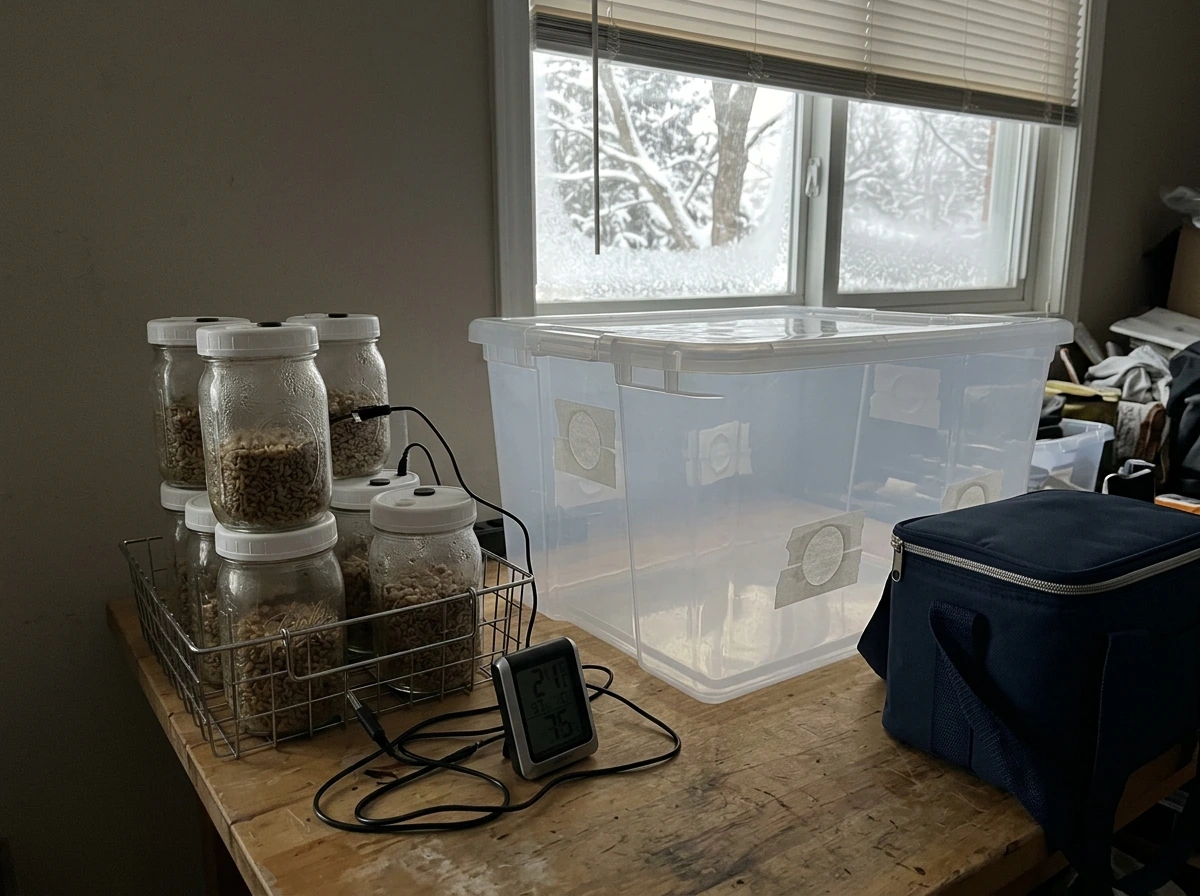
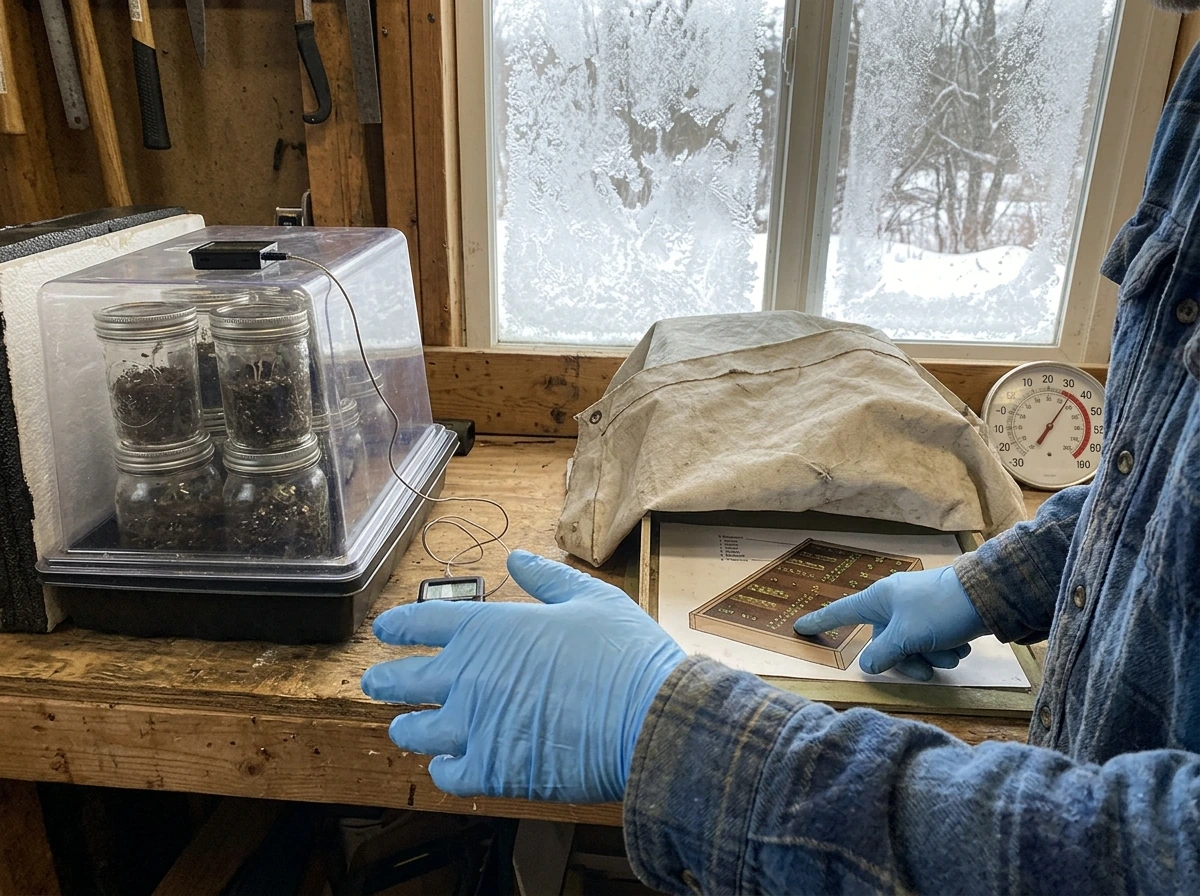
Incubation, fruiting conditions, and realistic timelines
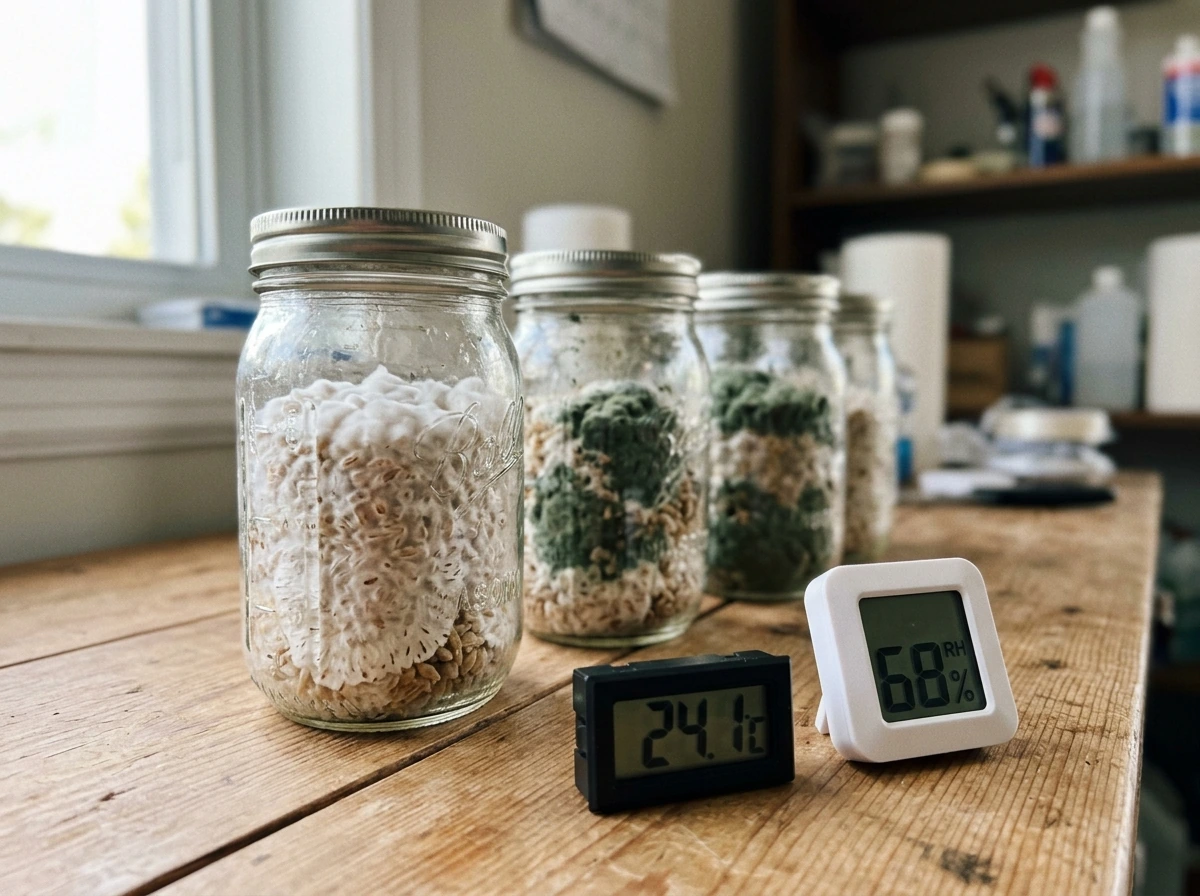
Colonization is the first major phase. Your inoculated grain jars need warmth and darkness. P. cubensis mycelium colonizes best between 75 and 80 degrees Fahrenheit. In Maine's colder homes, especially in winter, this can be tricky. A seedling heat mat under your jars, a small reptile heating mat, or even a dedicated incubation chamber (a large plastic tote with a heat mat and a thermometer) can keep temps stable without running up your heating bill. Avoid placing jars directly on the heat mat without a layer of cardboard or a towel in between, since direct contact can overheat the bottom of the jar.
Grain jars typically fully colonize in 2 to 4 weeks. You'll see white mycelium spreading through the grain. Shake the jars gently once when about 30 percent colonized to redistribute mycelium and speed things up. Once fully white and colonized, let the jars sit for another 5 to 7 days to consolidate before spawning to bulk substrate.
Spawning to bulk and triggering fruiting
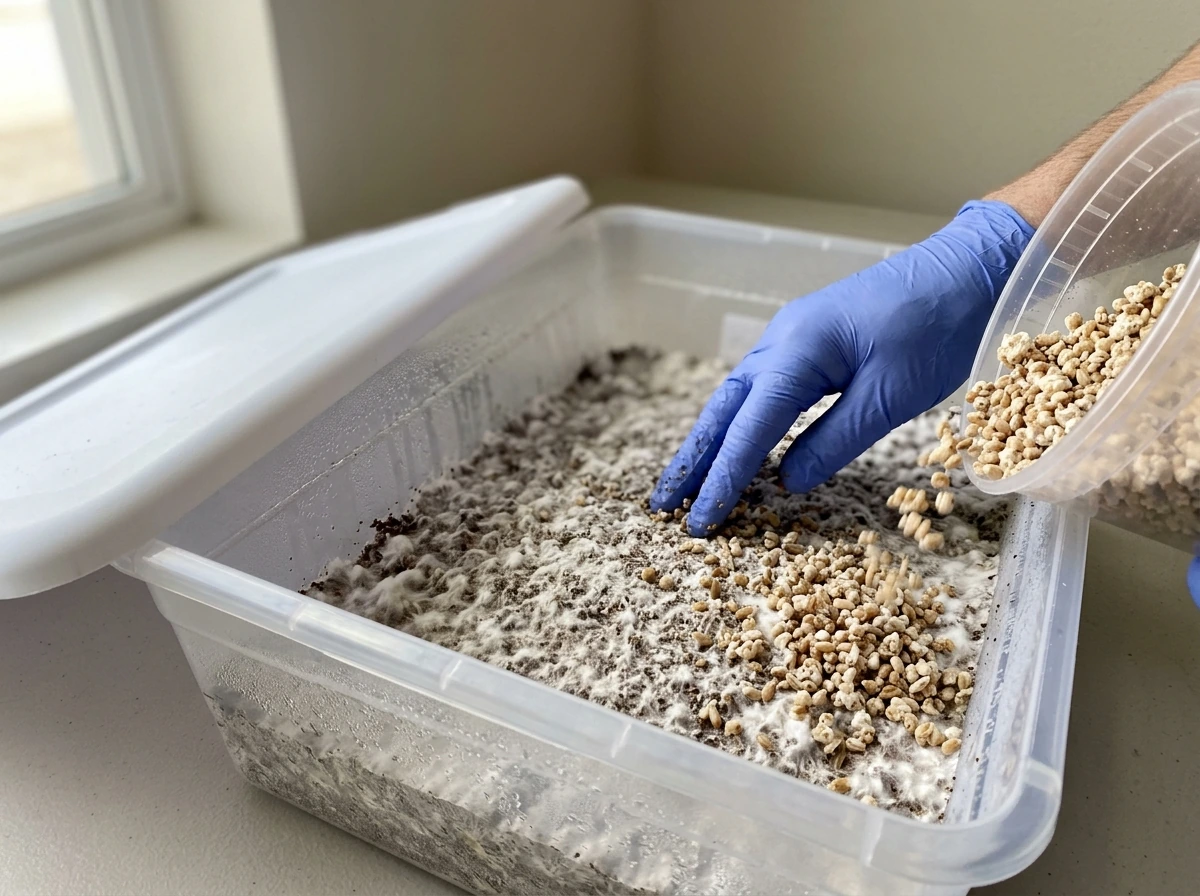
Spawn to bulk at a ratio of roughly 1 part colonized grain to 2 to 3 parts bulk substrate by volume. Mix in a clean monotub or large bin, then level the surface, and either leave the tub with the lid cracked slightly for gas exchange or drill small holes covered with polyfill. Keep the tub at 75 to 80°F for colonization of the bulk, which usually takes another 7 to 14 days.
Once the bulk substrate is fully colonized and you see a thick white layer across the surface, it's time to trigger fruiting. Drop the temperature to 68 to 74°F, introduce fresh air exchange by fanning the tub with the lid a few times a day, and maintain surface humidity by misting the walls of the tub (not directly onto the substrate surface) once or twice a day. Pins typically appear within 5 to 10 days of these fruiting conditions being introduced. Light matters too: a few hours of indirect light per day gives the mycelium a directional cue. A cheap grow light on a timer works fine.
| Phase | Temperature | Humidity | Duration |
|---|---|---|---|
| Grain colonization | 75 to 80°F | Not critical (sealed jars) | 2 to 4 weeks |
| Bulk colonization | 75 to 80°F | Not critical (sealed tub) | 1 to 2 weeks |
| Fruiting / pinning | 68 to 74°F | 90 to 95% RH | 5 to 10 days to first pins |
| Mushroom development | 68 to 74°F | 85 to 92% RH | 5 to 7 days from pin to harvest |
Harvesting, storing, and getting more flushes
Harvest mushrooms just before or as the veil under the cap starts to tear. Once the veil breaks, the mushroom begins dropping spores, which can complicate subsequent flushes and make your grow space messy. Twist and pull gently at the base to remove the entire mushroom without leaving a stub in the substrate. Stubs rot and invite contamination.
For drying and storage, a food dehydrator set to 95 to 115°F works well. Dry until the mushrooms are cracker-dry, meaning they snap cleanly rather than bend. Store in an airtight jar with a desiccant packet in a cool, dark location. Properly dried mushrooms stored this way can retain potency for a year or more.
After your first flush, remove any remaining stubs or aborts, mist the substrate surface lightly, and allow the tub to rest for 5 to 7 days. This rehydration period often produces a second and even third flush, though yields typically decrease with each successive flush. To help rehydration, some growers do a cold water soak: submerge the substrate block in cold water for 12 to 24 hours between flushes. Maine's cold tap water is actually useful here since cold temperatures help trigger the rehydration response. Expect two to three productive flushes before yields drop off significantly.
Troubleshooting contamination and stalled growth
Contamination and stalled colonization are the two things that will frustrate you most, especially in your first few grows. Here's how to read what's going wrong and fix it.
Green, black, or pink mold in your jars
Green mold is almost always Trichoderma, the most common contaminant in mushroom cultivation. It means your grain wasn't sterilized long enough, your technique broke sterility during inoculation, or your jars weren't sealed properly. A fully contaminated jar is a loss. Bag it, seal the bag, and throw it in the outdoor trash. Don't open contaminated jars inside your grow space. If you catch green mold very early and it's isolated to one small spot while the rest of the jar is healthy white mycelium, some growers gamble on letting it continue, but honestly the safer call is to toss it. One contaminated jar can spread spores throughout your grow space.
No colonization or very slow growth
If your jars show no growth after two weeks, check temperature first. In a cold Maine home, temperatures that feel warm to you can still be too cool for mycelium. Get a thermometer on the actual surface of your jars, not just in the room. If temps are fine, the spore syringe or liquid culture may have been dead or low quality. This is unfortunately common with cheap syringes. Buy from reputable vendors with recent reviews, and store spore syringes in the refrigerator (not freezer) when not in use.
Colonized tub won't pin
This is one of the most common frustrations. If your bulk substrate is fully colonized and you've been waiting more than two weeks with no pins, troubleshoot in this order: First, check that you're actually dropping the temperature for fruiting. Mycelium that stays at colonization temps doesn't get the signal to fruit. Second, check your fresh air exchange. Elevated CO2 suppresses pinning. Fan the tub more aggressively, several times a day. Third, check the surface of the substrate. If it's dried out or has a thick, leathery skin of mycelium (called overlay), lightly scratch the surface with a fork to expose fresh substrate, mist lightly, and wait. Overlay is common when colonization happens in too-humid or poorly-ventilated conditions.
Mushrooms growing but aborting before they develop
Aborts are small pins that stop developing and turn dark. A few aborts per flush are normal. A lot of aborts usually signal humidity swings, temperature swings, or too much direct airflow hitting the pins. In Maine in winter, cold drafts near windows or exterior walls can cause sudden temperature drops that stress pins. Keep your fruiting chamber away from exterior walls and out of the path of any heating vents.
Bacterial wet rot
If your substrate smells sour or has slimy, discolored patches, you have bacterial contamination, usually from grain that was too wet before sterilization or from water pooling in the tub during fruiting. Make sure your substrate is at field capacity (not waterlogged), and avoid misting directly onto the substrate surface. Mist the walls of the tub instead and let humidity settle naturally.
A few final thoughts before you start
Maine's climate makes indoor cultivation the practical choice for most growers here, especially during the long off-season from October through May. The good news is that once you're set up indoors, the cold climate outside becomes irrelevant. You control everything in the grow chamber. If you're interested in the broader cultivation process and want to dig deeper into how to grow psychedelic mushrooms species selection or general techniques before building your Maine-specific setup, the general cultivation guides on this site cover the full workflow in more detail. For growers in other cold-climate states navigating similar conditions, the approaches used in places like Wisconsin and Colorado translate well to Maine, see how to grow psychedelic mushrooms in Colorado for a focused walkthrough. how to grow psychedelic mushrooms in Illinois The good news is that once you're set up indoors, the cold climate outside becomes irrelevant. how to grow psychedelic mushrooms in illinois You control everything in the grow chamber. If you're interested in the broader cultivation process and want to dig deeper into how to grow psychedelic mushrooms species selection or general techniques before building your Maine-specific setup, the general cultivation guides on this site cover the full workflow in more detail. For growers in other cold-climate states navigating similar conditions, the approaches used in places like Wisconsin and Colorado translate well to Maine, see how to grow psychedelic mushrooms in Colorado for a focused walkthrough. how to grow psychedelic mushrooms in wisconsin
The actual growing process for psychedelic mushrooms is not dramatically different from growing oyster mushrooms or other specialty varieties in terms of the physical steps. What's different is the legal landscape, which you must treat as seriously as any other part of the process. Stay current on Maine law, understand federal law, and make informed decisions. If and when Maine's legal framework changes, the cultivation skills and knowledge you've built will transfer directly.
FAQ
Is it legal to grow psychedelic mushrooms for personal use in Maine if it is indoors and small scale?
The article’s key point still applies, cultivation and possession of psilocybin-containing mushrooms remain illegal under federal and Maine law. Even “small batch” indoor grows can trigger enforcement if any psilocybin-containing mushrooms are produced or possessed, so you should verify current status with a legal professional before acting.
Are mushroom spores legal to buy in Maine, and can I ship them to myself from out of state?
Spores may be legal to purchase and possess for microscopy in many places, but Maine’s rules can still include conditions, limits, or documentation expectations. In addition, shipping rules can differ from possession rules, so confirm both the buying jurisdiction and Maine’s current requirements, especially for any carrier disclosures.
If spores are legal, why is germinating them the problem legally?
Germinating spores to produce living mycelium intended for cultivation is treated differently because it moves from possessing reproductive material to producing psilocybin-containing organisms. A common mistake is treating “microscopy use” as a blanket excuse, so your intent and outcome matter, not just the purchase.
Can I use a regular kitchen pressure cooker instead of a dedicated mushroom sterilization setup?
Yes for sterilization, but only if it reaches proper pressure consistently and you can maintain a safe, repeatable sterilization cycle. Don’t “shortcut” time or pressure, and avoid using cookware that cannot be trusted for high-pressure conditions, because under-sterilized grain is a top contamination cause.
How do I avoid overheating jars when using a heat mat in a Maine winter?
Use insulation between the mat and jars (cardboard or a towel) and place a thermometer probe on the jar surface, not just in the room. If the jar surface climbs above the mycelium sweet spot, you can slow colonization or increase uneven growth, even if the room temperature looks correct.
What should I do if colonization looks healthy but the substrate starts stalling during the switch to fruiting?
After colonization, confirm you actually changed more than one variable. Many stalls happen when temperature drops were not enough, or when fresh air exchange was reduced at the same time. Use your routine in the same order every time, and verify airflow by observing condensation patterns on the chamber walls (too much or too little both can cause problems).
How much fresh air exchange is enough, and how can I tell if I am overdrying or overdrafting the pins?
Look at your pin stage response. If pins abort and surfaces look dry, you likely have too much direct airflow or misting too aggressively. If pins are slow and you see heavy condensation without pin clusters, you may have insufficient gas exchange or excessive humidity, so adjust ventilation and misting separately.
Should I mist the substrate surface directly to boost humidity?
No, mist the walls rather than the substrate surface. Direct misting often creates wet micro-spots that invite bacterial contamination and can also lead to overlay, which the article notes as a pinning blocker. If humidity is low, reduce airflow briefly and increase wall misting in small increments.
What is the fastest safe way to handle visible contamination during a grow?
Isolate immediately, do not open contaminated containers in the grow area, and bag and dispose sealed. For early small spots, some growers “attempt recovery,” but the safer decision for beginners is to discard, because one contaminated jar can seed spores or bacteria across your setup via airflow and handling.
Why do some flushes get worse quickly, even when I rehydrate and rest the tub?
Even with rest periods and correct rehydration, yield typically declines because nutrient content drops and the substrate structure degrades. A practical lever is reducing over-misting and preventing water pooling, because repeated wet-dry swings can increase bacterial load and create uneven rehydration.
Is cold tap water soaking between flushes safe for the whole substrate?
It can be useful, but avoid long soaks if your setup shows persistent bacterial symptoms or if waterlogging occurs. The article mentions 12 to 24 hours, and the key is letting the substrate drain and return to a stable humidity level before resuming fruiting conditions.
What’s the best way to dry mushrooms in a way that reduces mold risk later?
Dry until cracker-dry, then store in an airtight container with desiccant in a cool, dark place. A common mistake is stopping too early, which can leave case-hardening outside while the inside stays slightly pliable, increasing the chance of mold during storage.
How can I reduce the chance of contaminated jars if I have limited sterile space?
Move as much work as possible into the cleanest, least air-drifting area you have, and minimize time containers are open. Also, avoid “sterility theater,” like rushing inoculation steps, because technique failures during inoculation are repeatedly implicated in contamination outcomes.
Do the cultivation steps differ much from growing oyster mushrooms?
The workflow is physically similar, but the main differences you will notice in practice are species-specific substrate needs, timing cues, and, most importantly here, the legal implications of what you produce and possess. If you treat it like oyster mushroom cultivation without adjusting for the legal and environmental specifics, you can still run into serious compliance and contamination issues.